A medida que as empresas crescem, é normal que seu negócio ganhe além de volume, também complexidade.
O crescimento dos negócios faz em parte, também agregar em seus produtos, cada vez mais requisitos.
Criando um paralelo com a natureza, as empresas são como dinossáuros.
Começam como pequenas empresas, pequenas como ovos de dinossauro. Mas a medida que os anos passam, com novos projetos e novas implementações muita coisa muda.
Seus projetos crescem em requisitos, ganhando novas funcionalidades, muitas regras e várias ramificações.
Se tornando dinossauros gigantescos.
Sobre meu ponto de vista, não há nada errado em crescer.
O crescimento e aumento de complexidade é uma expressão natural, que exprime a ideia que um software se tornou versátil, e por vezes adaptativo, tanto a necessidades como a contextos de negócio.
O problema mais fundamental, é que projetos embrionários, são facilmente analisáveis, porem a medida que estes crescem. Cresce tambem sua dificuldade em analisar e solucionar problemas.
Tenho visto em minha vida profissional, mais constantemente. Que o sucesso, muitas vezes é acompanhado de muitos problemas.
Conhecimento é poder
Muitas vezes a empresa com foco total no cliente, atropela as boas práticas de gestão, confiando em processos e pessoas para manter sua produção.
Processos são de fato, protocolos que assumimos, estes precisam ser conhecidos, e seu treinamento exige formação prévia.
Pessoas são de fato, a parte mais sensível das empresas, pois muitas vezes possuem conhecimento vasto sobre os processos, e de fato, acaba sendo perdido em um eventual desligamento.
Centralização do conhecimento
A questão mais fundamental hoje, é que as pessoas podem sair, pessoas podem entrar, mas o conhecimento dos protocolos, do negocio deve permanecer.
Isso de fato, é de aceitação comum, pois hoje sabemos o custo dessa perda.
Como manter o conhecimento da sua empresa
De forma geral, em sistemas da informação, podemos dividir o conhecimento em 3 partes:
Para não ser muito técnico, vou apresentar um exemplo simples.
Um bolo, sim esses de loja de doces
Pensando no bolo, temos 3 tipos de informação
Do negócio
O bolo é uma mercadoria, então temos a gestão do negócio em si, como vender, as regras da venda, a questão dos tipos, os clientes, etc.
A documentação sobre o negócio, diz pouco sobre o bolo em sí, mas explica como este bolo será entregue, as pessoas, e o processo de entrega.
Do cliente
O bolo é entregue aos clientes, que por sua vez exigem uma série de documentos, tais como:
Tabela calórica
Valores nutricionais
Contra indicação
Validade e rastreabilidade
De forma geral, as documentações exigidas, são de fato as menos negligenciadas, pois são impostas pelo cliente, muitas vezes contando até de contratos formais.
Do bolo em si
Aqui esta a documentação muitas vezes a mais negligenciada.
As informações do bolo, são as receitas, equipamentos necessários e por vezes dependencias.
Nelas não só estão como é feita, mas também as dependências para seu preparo.
Realidade da vida
A maioria das vezes, tratamos com seriedade as documentações do cliente, que entregamos a cada entrega. Quando podemos a do negócio, mas muitas vezes deixamos as especificações do bolo, pois acreditamos que as pessoas as detém.
Na vida real o padeiro morre, muda de empresa, ou vira motorista de aplicativo.
E as empresas deixam de conhecer as informações, passando do sucesso ao desespero.
Solução
Estarei nos próximos artigos apresentando algumas soluções possíveis para todos os casos narrados, apresentando pontos focados para cada um das atividades que apresentei.
A instalação para execução necessita apenas da lib.
apt install libhidapi
Porem se voce quer desenvolver, precisará instalar o pacote de desenvolvimento:
apt install libhidapi-dev
Pacotes acessórios
apt install libhidapi-libusb libhidapi-hidraw
O hidraw é usado para integração com o kernel do linux e suporta o desenvimento de usb e bluetooth.
Já o usb é usado diretamente na camada de aplicação. Caso se deseja construir apenas uma das opções, a outra pode ser não utilizada.
Exemplo de código
#ifdef WIN32
#include <windows.h>
#endif
#include <stdio.h>
#include <stdlib.h>
#include "hidapi.h"

#define MAX_STR 255

int main(int argc, char* argv[])
{
	int res;
	unsigned char buf[65];
	wchar_t wstr[MAX_STR];
	hid_device *handle;
	int i;

	// Initialize the hidapi library
	res = hid_init();

	// Open the device using the VID, PID,
	// and optionally the Serial number.
	handle = hid_open(0x4d8, 0x3f, NULL);

	// Read the Manufacturer String
	res = hid_get_manufacturer_string(handle, wstr, MAX_STR);
	wprintf(L"Manufacturer String: %s\n", wstr);

	// Read the Product String
	res = hid_get_product_string(handle, wstr, MAX_STR);
	wprintf(L"Product String: %s\n", wstr);

	// Read the Serial Number String
	res = hid_get_serial_number_string(handle, wstr, MAX_STR);
	wprintf(L"Serial Number String: (%d) %s\n", wstr[0], wstr);

	// Read Indexed String 1
	res = hid_get_indexed_string(handle, 1, wstr, MAX_STR);
	wprintf(L"Indexed String 1: %s\n", wstr);

	// Toggle LED (cmd 0x80). The first byte is the report number (0x0).
	buf[0] = 0x0;
	buf[1] = 0x80;
	res = hid_write(handle, buf, 65);

	// Request state (cmd 0x81). The first byte is the report number (0x0).
	buf[0] = 0x0;
	buf[1] = 0x81;
	res = hid_write(handle, buf, 65);

	// Read requested state
	res = hid_read(handle, buf, 65);

	// Print out the returned buffer.
	for (i = 0; i < 4; i++)
		printf("buf[%d]: %d\n", i, buf[i]);

	// Close the device
	hid_close(handle);

	// Finalize the hidapi library
	res = hid_exit();

	return 0;
}
No exemplo acima temos alguns fragmentos importantes.
hid_init
Esta função inicializa a biblioteca;
hid_open
A função hid_open, carrega o device, sempre pedindo o VID e o PID do dispositivo USB.
hid_close
A função close, descarrega a função, tendo ser chamada ao fim de sua execução.
O Doxygen é um gerador de documentação automática, que permite incluir e disponibilizar documentação in code (dentro do código do seu projeto).
Estarei aqui apresentando como fazer isso, inclusive montando um modelo de documentação para que isso seja realizado.
Primeiro passo:
Instalar o doxygen em seu linux.
apt install doxygen
Com este processo, voce terá o doxygen disponível em sua maquina para futura utilização.
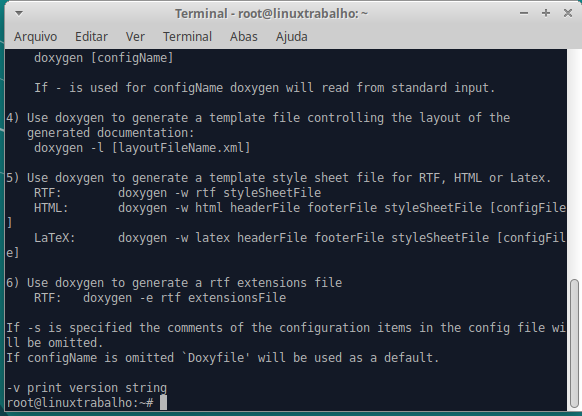
Para confirmar a instalação rode o doxygen
doxygen
O resultado do comando será como o mostrado abaixo:
Passo 2 Montar arquivo de configuração doxygen
Agora precisaremos criar o arquivo doxygenfile, conforme exemplo abaixo:
# Doxyfile 1.8.13

# This file describes the settings to be used by the documentation system
# doxygen (www.doxygen.org) for a project.
#
# All text after a double hash (##) is considered a comment and is placed in
# front of the TAG it is preceding.
#
# All text after a single hash (#) is considered a comment and will be ignored.
# The format is:
# TAG = value [value, ...]
# For lists, items can also be appended using:
# TAG += value [value, ...]
# Values that contain spaces should be placed between quotes (\" \").

#---------------------------------------------------------------------------
# Project related configuration options
#---------------------------------------------------------------------------

# This tag specifies the encoding used for all characters in the config file
# that follow. The default is UTF-8 which is also the encoding used for all text
# before the first occurrence of this tag. Doxygen uses libiconv (or the iconv
# built into libc) for the transcoding. See http://www.gnu.org/software/libiconv
# for the list of possible encodings.
# The default value is: UTF-8.

DOXYFILE_ENCODING      = UTF-8

# The PROJECT_NAME tag is a single word (or a sequence of words surrounded by
# double-quotes, unless you are using Doxywizard) that should identify the
# project for which the documentation is generated. This name is used in the
# title of most generated pages and in a few other places.
# The default value is: My Project.

PROJECT_NAME           = "seu projeto"

# The PROJECT_NUMBER tag can be used to enter a project or revision number. This
# could be handy for archiving the generated documentation or if some version
# control system is used.

PROJECT_NUMBER         =

# Using the PROJECT_BRIEF tag one can provide an optional one line description
# for a project that appears at the top of each page and should give viewer a
# quick idea about the purpose of the project. Keep the description short.

PROJECT_BRIEF          = "Descrição do seu projeto"

# With the PROJECT_LOGO tag one can specify a logo or an icon that is included
# in the documentation. The maximum height of the logo should not exceed 55
# pixels and the maximum width should not exceed 200 pixels. Doxygen will copy
# the logo to the output directory.

PROJECT_LOGO           =

# The OUTPUT_DIRECTORY tag is used to specify the (relative or absolute) path
# into which the generated documentation will be written. If a relative path is
# entered, it will be relative to the location where doxygen was started. If
# left blank the current directory will be used.

OUTPUT_DIRECTORY       = ./docs/

# If the CREATE_SUBDIRS tag is set to YES then doxygen will create 4096 sub-
# directories (in 2 levels) under the output directory of each output format and
# will distribute the generated files over these directories. Enabling this
# option can be useful when feeding doxygen a huge amount of source files, where
# putting all generated files in the same directory would otherwise causes
# performance problems for the file system.
# The default value is: NO.

CREATE_SUBDIRS         = NO

# If the ALLOW_UNICODE_NAMES tag is set to YES, doxygen will allow non-ASCII
# characters to appear in the names of generated files. If set to NO, non-ASCII
# characters will be escaped, for example _xE3_x81_x84 will be used for Unicode
# U+3044.
# The default value is: NO.

ALLOW_UNICODE_NAMES    = NO

# The OUTPUT_LANGUAGE tag is used to specify the language in which all
# documentation generated by doxygen is written. Doxygen will use this
# information to generate all constant output in the proper language.
# Possible values are: Afrikaans, Arabic, Armenian, Brazilian, Catalan, Chinese,
# Chinese-Traditional, Croatian, Czech, Danish, Dutch, English (United States),
# Esperanto, Farsi (Persian), Finnish, French, German, Greek, Hungarian,
# Indonesian, Italian, Japanese, Japanese-en (Japanese with English messages),
# Korean, Korean-en (Korean with English messages), Latvian, Lithuanian,
# Macedonian, Norwegian, Persian (Farsi), Polish, Portuguese, Romanian, Russian,
# Serbian, Serbian-Cyrillic, Slovak, Slovene, Spanish, Swedish, Turkish,
# Ukrainian and Vietnamese.
# The default value is: English.

OUTPUT_LANGUAGE        = Brazilian

# If the BRIEF_MEMBER_DESC tag is set to YES, doxygen will include brief member
# descriptions after the members that are listed in the file and class
# documentation (similar to Javadoc). Set to NO to disable this.
# The default value is: YES.

BRIEF_MEMBER_DESC      = YES

# If the REPEAT_BRIEF tag is set to YES, doxygen will prepend the brief
# description of a member or function before the detailed description
#
# Note: If both HIDE_UNDOC_MEMBERS and BRIEF_MEMBER_DESC are set to NO, the
# brief descriptions will be completely suppressed.
# The default value is: YES.

REPEAT_BRIEF           = YES

# This tag implements a quasi-intelligent brief description abbreviator that is
# used to form the text in various listings. Each string in this list, if found
# as the leading text of the brief description, will be stripped from the text
# and the result, after processing the whole list, is used as the annotated
# text. Otherwise, the brief description is used as-is. If left blank, the
# following values are used ($name is automatically replaced with the name of
# the entity):The $name class, The $name widget, The $name file, is, provides,
# specifies, contains, represents, a, an and the.

ABBREVIATE_BRIEF       = "The $name class" \
                         "The $name widget" \
                         "The $name file" \
                         is \
                         provides \
                         specifies \
                         contains \
                         represents \
                         a \
                         an \
                         the

# If the ALWAYS_DETAILED_SEC and REPEAT_BRIEF tags are both set to YES then
# doxygen will generate a detailed section even if there is only a brief
# description.
# The default value is: NO.

ALWAYS_DETAILED_SEC    = NO

# If the INLINE_INHERITED_MEMB tag is set to YES, doxygen will show all
# inherited members of a class in the documentation of that class as if those
# members were ordinary class members. Constructors, destructors and assignment
# operators of the base classes will not be shown.
# The default value is: NO.

INLINE_INHERITED_MEMB  = NO

# If the FULL_PATH_NAMES tag is set to YES, doxygen will prepend the full path
# before files name in the file list and in the header files. If set to NO the
# shortest path that makes the file name unique will be used
# The default value is: YES.

FULL_PATH_NAMES        = YES

# The STRIP_FROM_PATH tag can be used to strip a user-defined part of the path.
# Stripping is only done if one of the specified strings matches the left-hand
# part of the path. The tag can be used to show relative paths in the file list.
# If left blank the directory from which doxygen is run is used as the path to
# strip.
#
# Note that you can specify absolute paths here, but also relative paths, which
# will be relative from the directory where doxygen is started.
# This tag requires that the tag FULL_PATH_NAMES is set to YES.

STRIP_FROM_PATH        =

# The STRIP_FROM_INC_PATH tag can be used to strip a user-defined part of the
# path mentioned in the documentation of a class, which tells the reader which
# header file to include in order to use a class. If left blank only the name of
# the header file containing the class definition is used. Otherwise one should
# specify the list of include paths that are normally passed to the compiler
# using the -I flag.

STRIP_FROM_INC_PATH    =

# If the SHORT_NAMES tag is set to YES, doxygen will generate much shorter (but
# less readable) file names. This can be useful is your file systems doesn't
# support long names like on DOS, Mac, or CD-ROM.
# The default value is: NO.

SHORT_NAMES            = NO

# If the JAVADOC_AUTOBRIEF tag is set to YES then doxygen will interpret the
# first line (until the first dot) of a Javadoc-style comment as the brief
# description. If set to NO, the Javadoc-style will behave just like regular Qt-
# style comments (thus requiring an explicit @brief command for a brief
# description.)
# The default value is: NO.

JAVADOC_AUTOBRIEF      = NO

# If the QT_AUTOBRIEF tag is set to YES then doxygen will interpret the first
# line (until the first dot) of a Qt-style comment as the brief description. If
# set to NO, the Qt-style will behave just like regular Qt-style comments (thus
# requiring an explicit \brief command for a brief description.)
# The default value is: NO.

QT_AUTOBRIEF           = NO

# The MULTILINE_CPP_IS_BRIEF tag can be set to YES to make doxygen treat a
# multi-line C++ special comment block (i.e. a block of //! or /// comments) as
# a brief description. This used to be the default behavior. The new default is
# to treat a multi-line C++ comment block as a detailed description. Set this
# tag to YES if you prefer the old behavior instead.
#
# Note that setting this tag to YES also means that rational rose comments are
# not recognized any more.
# The default value is: NO.

MULTILINE_CPP_IS_BRIEF = NO

# If the INHERIT_DOCS tag is set to YES then an undocumented member inherits the
# documentation from any documented member that it re-implements.
# The default value is: YES.

INHERIT_DOCS           = YES

# If the SEPARATE_MEMBER_PAGES tag is set to YES then doxygen will produce a new
# page for each member. If set to NO, the documentation of a member will be part
# of the file/class/namespace that contains it.
# The default value is: NO.

SEPARATE_MEMBER_PAGES  = NO

# The TAB_SIZE tag can be used to set the number of spaces in a tab. Doxygen
# uses this value to replace tabs by spaces in code fragments.
# Minimum value: 1, maximum value: 16, default value: 4.

TAB_SIZE               = 4

# This tag can be used to specify a number of aliases that act as commands in
# the documentation. An alias has the form:
# name=value
# For example adding
# "sideeffect=@par Side Effects:\n"
# will allow you to put the command \sideeffect (or @sideeffect) in the
# documentation, which will result in a user-defined paragraph with heading
# "Side Effects:". You can put \n's in the value part of an alias to insert
# newlines.

ALIASES                =

# This tag can be used to specify a number of word-keyword mappings (TCL only).
# A mapping has the form "name=value". For example adding "class=itcl::class"
# will allow you to use the command class in the itcl::class meaning.

TCL_SUBST              =

# Set the OPTIMIZE_OUTPUT_FOR_C tag to YES if your project consists of C sources
# only. Doxygen will then generate output that is more tailored for C. For
# instance, some of the names that are used will be different. The list of all
# members will be omitted, etc.
# The default value is: NO.

OPTIMIZE_OUTPUT_FOR_C  = YES

# Set the OPTIMIZE_OUTPUT_JAVA tag to YES if your project consists of Java or
# Python sources only. Doxygen will then generate output that is more tailored
# for that language. For instance, namespaces will be presented as packages,
# qualified scopes will look different, etc.
# The default value is: NO.

OPTIMIZE_OUTPUT_JAVA   = NO

# Set the OPTIMIZE_FOR_FORTRAN tag to YES if your project consists of Fortran
# sources. Doxygen will then generate output that is tailored for Fortran.
# The default value is: NO.

OPTIMIZE_FOR_FORTRAN   = NO

# Set the OPTIMIZE_OUTPUT_VHDL tag to YES if your project consists of VHDL
# sources. Doxygen will then generate output that is tailored for VHDL.
# The default value is: NO.

OPTIMIZE_OUTPUT_VHDL   = NO

# Doxygen selects the parser to use depending on the extension of the files it
# parses. With this tag you can assign which parser to use for a given
# extension. Doxygen has a built-in mapping, but you can override or extend it
# using this tag. The format is ext=language, where ext is a file extension, and
# language is one of the parsers supported by doxygen: IDL, Java, Javascript,
# C#, C, C++, D, PHP, Objective-C, Python, Fortran (fixed format Fortran:
# FortranFixed, free formatted Fortran: FortranFree, unknown formatted Fortran:
# Fortran. In the later case the parser tries to guess whether the code is fixed
# or free formatted code, this is the default for Fortran type files), VHDL. For
# instance to make doxygen treat .inc files as Fortran files (default is PHP),
# and .f files as C (default is Fortran), use: inc=Fortran f=C.
#
# Note: For files without extension you can use no_extension as a placeholder.
#
# Note that for custom extensions you also need to set FILE_PATTERNS otherwise
# the files are not read by doxygen.

EXTENSION_MAPPING      =

# If the MARKDOWN_SUPPORT tag is enabled then doxygen pre-processes all comments
# according to the Markdown format, which allows for more readable
# documentation. See http://daringfireball.net/projects/markdown/ for details.
# The output of markdown processing is further processed by doxygen, so you can
# mix doxygen, HTML, and XML commands with Markdown formatting. Disable only in
# case of backward compatibilities issues.
# The default value is: YES.

MARKDOWN_SUPPORT       = YES

# When the TOC_INCLUDE_HEADINGS tag is set to a non-zero value, all headings up
# to that level are automatically included in the table of contents, even if
# they do not have an id attribute.
# Note: This feature currently applies only to Markdown headings.
# Minimum value: 0, maximum value: 99, default value: 0.
# This tag requires that the tag MARKDOWN_SUPPORT is set to YES.

TOC_INCLUDE_HEADINGS   = 0

# When enabled doxygen tries to link words that correspond to documented
# classes, or namespaces to their corresponding documentation. Such a link can
# be prevented in individual cases by putting a % sign in front of the word or
# globally by setting AUTOLINK_SUPPORT to NO.
# The default value is: YES.

AUTOLINK_SUPPORT       = YES

# If you use STL classes (i.e. std::string, std::vector, etc.) but do not want
# to include (a tag file for) the STL sources as input, then you should set this
# tag to YES in order to let doxygen match functions declarations and
# definitions whose arguments contain STL classes (e.g. func(std::string);
# versus func(std::string) {}). This also make the inheritance and collaboration
# diagrams that involve STL classes more complete and accurate.
# The default value is: NO.

BUILTIN_STL_SUPPORT    = NO

# If you use Microsoft's C++/CLI language, you should set this option to YES to
# enable parsing support.
# The default value is: NO.

CPP_CLI_SUPPORT        = NO

# Set the SIP_SUPPORT tag to YES if your project consists of sip (see:
# http://www.riverbankcomputing.co.uk/software/sip/intro) sources only. Doxygen
# will parse them like normal C++ but will assume all classes use public instead
# of private inheritance when no explicit protection keyword is present.
# The default value is: NO.

SIP_SUPPORT            = NO

# For Microsoft's IDL there are propget and propput attributes to indicate
# getter and setter methods for a property. Setting this option to YES will make
# doxygen to replace the get and set methods by a property in the documentation.
# This will only work if the methods are indeed getting or setting a simple
# type. If this is not the case, or you want to show the methods anyway, you
# should set this option to NO.
# The default value is: YES.

IDL_PROPERTY_SUPPORT   = YES

# If member grouping is used in the documentation and the DISTRIBUTE_GROUP_DOC
# tag is set to YES then doxygen will reuse the documentation of the first
# member in the group (if any) for the other members of the group. By default
# all members of a group must be documented explicitly.
# The default value is: NO.

DISTRIBUTE_GROUP_DOC   = NO

# If one adds a struct or class to a group and this option is enabled, then also
# any nested class or struct is added to the same group. By default this option
# is disabled and one has to add nested compounds explicitly via \ingroup.
# The default value is: NO.

GROUP_NESTED_COMPOUNDS = NO

# Set the SUBGROUPING tag to YES to allow class member groups of the same type
# (for instance a group of public functions) to be put as a subgroup of that
# type (e.g. under the Public Functions section). Set it to NO to prevent
# subgrouping. Alternatively, this can be done per class using the
# \nosubgrouping command.
# The default value is: YES.

SUBGROUPING            = YES

# When the INLINE_GROUPED_CLASSES tag is set to YES, classes, structs and unions
# are shown inside the group in which they are included (e.g. using \ingroup)
# instead of on a separate page (for HTML and Man pages) or section (for LaTeX
# and RTF).
# Note that this feature does not work in combination with
# SEPARATE_MEMBER_PAGES.
# The default value is: NO.

INLINE_GROUPED_CLASSES = NO

# When the INLINE_SIMPLE_STRUCTS tag is set to YES, structs, classes, and unions
# with only public data fields or simple typedef fields will be shown inline in
# the documentation of the scope in which they are defined (i.e. file,
# namespace, or group documentation), provided this scope is documented. If set
# to NO, structs, classes, and unions are shown on a separate page (for HTML and
# Man pages) or section (for LaTeX and RTF).
# The default value is: NO.

INLINE_SIMPLE_STRUCTS  = NO

# When TYPEDEF_HIDES_STRUCT tag is enabled, a typedef of a struct, union, or
# enum is documented as struct, union, or enum with the name of the typedef. So
# typedef struct TypeS {} TypeT, will appear in the documentation as a struct
# with name TypeT. When disabled the typedef will appear as a member of a file,
# namespace, or class. And the struct will be named TypeS. This can typically be
# useful for C code in case the coding convention dictates that all compound
# types are typedef'ed and only the typedef is referenced, never the tag name.
# The default value is: NO.

TYPEDEF_HIDES_STRUCT   = NO

# The size of the symbol lookup cache can be set using LOOKUP_CACHE_SIZE. This
# cache is used to resolve symbols given their name and scope. Since this can be
# an expensive process and often the same symbol appears multiple times in the
# code, doxygen keeps a cache of pre-resolved symbols. If the cache is too small
# doxygen will become slower. If the cache is too large, memory is wasted. The
# cache size is given by this formula: 2^(16+LOOKUP_CACHE_SIZE). The valid range
# is 0..9, the default is 0, corresponding to a cache size of 2^16=65536
# symbols. At the end of a run doxygen will report the cache usage and suggest
# the optimal cache size from a speed point of view.
# Minimum value: 0, maximum value: 9, default value: 0.

LOOKUP_CACHE_SIZE      = 0

#---------------------------------------------------------------------------
# Build related configuration options
#---------------------------------------------------------------------------

# If the EXTRACT_ALL tag is set to YES, doxygen will assume all entities in
# documentation are documented, even if no documentation was available. Private
# class members and static file members will be hidden unless the
# EXTRACT_PRIVATE respectively EXTRACT_STATIC tags are set to YES.
# Note: This will also disable the warnings about undocumented members that are
# normally produced when WARNINGS is set to YES.
# The default value is: NO.

EXTRACT_ALL            = NO

# If the EXTRACT_PRIVATE tag is set to YES, all private members of a class will
# be included in the documentation.
# The default value is: NO.

EXTRACT_PRIVATE        = NO

# If the EXTRACT_PACKAGE tag is set to YES, all members with package or internal
# scope will be included in the documentation.
# The default value is: NO.

EXTRACT_PACKAGE        = NO

# If the EXTRACT_STATIC tag is set to YES, all static members of a file will be
# included in the documentation.
# The default value is: NO.

EXTRACT_STATIC         = NO

# If the EXTRACT_LOCAL_CLASSES tag is set to YES, classes (and structs) defined
# locally in source files will be included in the documentation. If set to NO,
# only classes defined in header files are included. Does not have any effect
# for Java sources.
# The default value is: YES.

EXTRACT_LOCAL_CLASSES  = YES

# This flag is only useful for Objective-C code. If set to YES, local methods,
# which are defined in the implementation section but not in the interface are
# included in the documentation. If set to NO, only methods in the interface are
# included.
# The default value is: NO.

EXTRACT_LOCAL_METHODS  = NO

# If this flag is set to YES, the members of anonymous namespaces will be
# extracted and appear in the documentation as a namespace called
# 'anonymous_namespace{file}', where file will be replaced with the base name of
# the file that contains the anonymous namespace. By default anonymous namespace
# are hidden.
# The default value is: NO.

EXTRACT_ANON_NSPACES   = NO

# If the HIDE_UNDOC_MEMBERS tag is set to YES, doxygen will hide all
# undocumented members inside documented classes or files. If set to NO these
# members will be included in the various overviews, but no documentation
# section is generated. This option has no effect if EXTRACT_ALL is enabled.
# The default value is: NO.

HIDE_UNDOC_MEMBERS     = NO

# If the HIDE_UNDOC_CLASSES tag is set to YES, doxygen will hide all
# undocumented classes that are normally visible in the class hierarchy. If set
# to NO, these classes will be included in the various overviews. This option
# has no effect if EXTRACT_ALL is enabled.
# The default value is: NO.

HIDE_UNDOC_CLASSES     = NO

# If the HIDE_FRIEND_COMPOUNDS tag is set to YES, doxygen will hide all friend
# (class|struct|union) declarations. If set to NO, these declarations will be
# included in the documentation.
# The default value is: NO.

HIDE_FRIEND_COMPOUNDS  = NO

# If the HIDE_IN_BODY_DOCS tag is set to YES, doxygen will hide any
# documentation blocks found inside the body of a function. If set to NO, these
# blocks will be appended to the function's detailed documentation block.
# The default value is: NO.

HIDE_IN_BODY_DOCS      = NO

# The INTERNAL_DOCS tag determines if documentation that is typed after a
# \internal command is included. If the tag is set to NO then the documentation
# will be excluded. Set it to YES to include the internal documentation.
# The default value is: NO.

INTERNAL_DOCS          = NO

# If the CASE_SENSE_NAMES tag is set to NO then doxygen will only generate file
# names in lower-case letters. If set to YES, upper-case letters are also
# allowed. This is useful if you have classes or files whose names only differ
# in case and if your file system supports case sensitive file names. Windows
# and Mac users are advised to set this option to NO.
# The default value is: system dependent.

CASE_SENSE_NAMES       = YES

# If the HIDE_SCOPE_NAMES tag is set to NO then doxygen will show members with
# their full class and namespace scopes in the documentation. If set to YES, the
# scope will be hidden.
# The default value is: NO.

HIDE_SCOPE_NAMES       = NO

# If the HIDE_COMPOUND_REFERENCE tag is set to NO (default) then doxygen will
# append additional text to a page's title, such as Class Reference. If set to
# YES the compound reference will be hidden.
# The default value is: NO.

HIDE_COMPOUND_REFERENCE= NO

# If the SHOW_INCLUDE_FILES tag is set to YES then doxygen will put a list of
# the files that are included by a file in the documentation of that file.
# The default value is: YES.

SHOW_INCLUDE_FILES     = YES

# If the SHOW_GROUPED_MEMB_INC tag is set to YES then Doxygen will add for each
# grouped member an include statement to the documentation, telling the reader
# which file to include in order to use the member.
# The default value is: NO.

SHOW_GROUPED_MEMB_INC  = NO

# If the FORCE_LOCAL_INCLUDES tag is set to YES then doxygen will list include
# files with double quotes in the documentation rather than with sharp brackets.
# The default value is: NO.

FORCE_LOCAL_INCLUDES   = NO

# If the INLINE_INFO tag is set to YES then a tag [inline] is inserted in the
# documentation for inline members.
# The default value is: YES.

INLINE_INFO            = YES

# If the SORT_MEMBER_DOCS tag is set to YES then doxygen will sort the
# (detailed) documentation of file and class members alphabetically by member
# name. If set to NO, the members will appear in declaration order.
# The default value is: YES.

SORT_MEMBER_DOCS       = YES

# If the SORT_BRIEF_DOCS tag is set to YES then doxygen will sort the brief
# descriptions of file, namespace and class members alphabetically by member
# name. If set to NO, the members will appear in declaration order. Note that
# this will also influence the order of the classes in the class list.
# The default value is: NO.

SORT_BRIEF_DOCS        = NO

# If the SORT_MEMBERS_CTORS_1ST tag is set to YES then doxygen will sort the
# (brief and detailed) documentation of class members so that constructors and
# destructors are listed first. If set to NO the constructors will appear in the
# respective orders defined by SORT_BRIEF_DOCS and SORT_MEMBER_DOCS.
# Note: If SORT_BRIEF_DOCS is set to NO this option is ignored for sorting brief
# member documentation.
# Note: If SORT_MEMBER_DOCS is set to NO this option is ignored for sorting
# detailed member documentation.
# The default value is: NO.

SORT_MEMBERS_CTORS_1ST = NO

# If the SORT_GROUP_NAMES tag is set to YES then doxygen will sort the hierarchy
# of group names into alphabetical order. If set to NO the group names will
# appear in their defined order.
# The default value is: NO.

SORT_GROUP_NAMES       = NO

# If the SORT_BY_SCOPE_NAME tag is set to YES, the class list will be sorted by
# fully-qualified names, including namespaces. If set to NO, the class list will
# be sorted only by class name, not including the namespace part.
# Note: This option is not very useful if HIDE_SCOPE_NAMES is set to YES.
# Note: This option applies only to the class list, not to the alphabetical
# list.
# The default value is: NO.

SORT_BY_SCOPE_NAME     = NO

# If the STRICT_PROTO_MATCHING option is enabled and doxygen fails to do proper
# type resolution of all parameters of a function it will reject a match between
# the prototype and the implementation of a member function even if there is
# only one candidate or it is obvious which candidate to choose by doing a
# simple string match. By disabling STRICT_PROTO_MATCHING doxygen will still
# accept a match between prototype and implementation in such cases.
# The default value is: NO.

STRICT_PROTO_MATCHING  = NO

# The GENERATE_TODOLIST tag can be used to enable (YES) or disable (NO) the todo
# list. This list is created by putting \todo commands in the documentation.
# The default value is: YES.

GENERATE_TODOLIST      = YES

# The GENERATE_TESTLIST tag can be used to enable (YES) or disable (NO) the test
# list. This list is created by putting \test commands in the documentation.
# The default value is: YES.

GENERATE_TESTLIST      = YES

# The GENERATE_BUGLIST tag can be used to enable (YES) or disable (NO) the bug
# list. This list is created by putting \bug commands in the documentation.
# The default value is: YES.

GENERATE_BUGLIST       = YES

# The GENERATE_DEPRECATEDLIST tag can be used to enable (YES) or disable (NO)
# the deprecated list. This list is created by putting \deprecated commands in
# the documentation.
# The default value is: YES.

GENERATE_DEPRECATEDLIST= YES

# The ENABLED_SECTIONS tag can be used to enable conditional documentation
# sections, marked by \if <section_label> ... \endif and \cond <section_label>
# ... \endcond blocks.

ENABLED_SECTIONS       =

# The MAX_INITIALIZER_LINES tag determines the maximum number of lines that the
# initial value of a variable or macro / define can have for it to appear in the
# documentation. If the initializer consists of more lines than specified here
# it will be hidden. Use a value of 0 to hide initializers completely. The
# appearance of the value of individual variables and macros / defines can be
# controlled using \showinitializer or \hideinitializer command in the
# documentation regardless of this setting.
# Minimum value: 0, maximum value: 10000, default value: 30.

MAX_INITIALIZER_LINES  = 30

# Set the SHOW_USED_FILES tag to NO to disable the list of files generated at
# the bottom of the documentation of classes and structs. If set to YES, the
# list will mention the files that were used to generate the documentation.
# The default value is: YES.

SHOW_USED_FILES        = YES

# Set the SHOW_FILES tag to NO to disable the generation of the Files page. This
# will remove the Files entry from the Quick Index and from the Folder Tree View
# (if specified).
# The default value is: YES.

SHOW_FILES             = YES

# Set the SHOW_NAMESPACES tag to NO to disable the generation of the Namespaces
# page. This will remove the Namespaces entry from the Quick Index and from the
# Folder Tree View (if specified).
# The default value is: YES.

SHOW_NAMESPACES        = YES

# The FILE_VERSION_FILTER tag can be used to specify a program or script that
# doxygen should invoke to get the current version for each file (typically from
# the version control system). Doxygen will invoke the program by executing (via
# popen()) the command command input-file, where command is the value of the
# FILE_VERSION_FILTER tag, and input-file is the name of an input file provided
# by doxygen. Whatever the program writes to standard output is used as the file
# version. For an example see the documentation.

FILE_VERSION_FILTER    =

# The LAYOUT_FILE tag can be used to specify a layout file which will be parsed
# by doxygen. The layout file controls the global structure of the generated
# output files in an output format independent way. To create the layout file
# that represents doxygen's defaults, run doxygen with the -l option. You can
# optionally specify a file name after the option, if omitted DoxygenLayout.xml
# will be used as the name of the layout file.
#
# Note that if you run doxygen from a directory containing a file called
# DoxygenLayout.xml, doxygen will parse it automatically even if the LAYOUT_FILE
# tag is left empty.

LAYOUT_FILE            =

# The CITE_BIB_FILES tag can be used to specify one or more bib files containing
# the reference definitions. This must be a list of .bib files. The .bib
# extension is automatically appended if omitted. This requires the bibtex tool
# to be installed. See also http://en.wikipedia.org/wiki/BibTeX for more info.
# For LaTeX the style of the bibliography can be controlled using
# LATEX_BIB_STYLE. To use this feature you need bibtex and perl available in the
# search path. See also \cite for info how to create references.

CITE_BIB_FILES         =

#---------------------------------------------------------------------------
# Configuration options related to warning and progress messages
#---------------------------------------------------------------------------

# The QUIET tag can be used to turn on/off the messages that are generated to
# standard output by doxygen. If QUIET is set to YES this implies that the
# messages are off.
# The default value is: NO.

QUIET                  = NO

# The WARNINGS tag can be used to turn on/off the warning messages that are
# generated to standard error (stderr) by doxygen. If WARNINGS is set to YES
# this implies that the warnings are on.
#
# Tip: Turn warnings on while writing the documentation.
# The default value is: YES.

WARNINGS               = YES

# If the WARN_IF_UNDOCUMENTED tag is set to YES then doxygen will generate
# warnings for undocumented members. If EXTRACT_ALL is set to YES then this flag
# will automatically be disabled.
# The default value is: YES.

WARN_IF_UNDOCUMENTED   = YES

# If the WARN_IF_DOC_ERROR tag is set to YES, doxygen will generate warnings for
# potential errors in the documentation, such as not documenting some parameters
# in a documented function, or documenting parameters that don't exist or using
# markup commands wrongly.
# The default value is: YES.

WARN_IF_DOC_ERROR      = YES

# This WARN_NO_PARAMDOC option can be enabled to get warnings for functions that
# are documented, but have no documentation for their parameters or return
# value. If set to NO, doxygen will only warn about wrong or incomplete
# parameter documentation, but not about the absence of documentation.
# The default value is: NO.

WARN_NO_PARAMDOC       = NO

# If the WARN_AS_ERROR tag is set to YES then doxygen will immediately stop when
# a warning is encountered.
# The default value is: NO.

WARN_AS_ERROR          = NO

# The WARN_FORMAT tag determines the format of the warning messages that doxygen
# can produce. The string should contain the $file, $line, and $text tags, which
# will be replaced by the file and line number from which the warning originated
# and the warning text. Optionally the format may contain $version, which will
# be replaced by the version of the file (if it could be obtained via
# FILE_VERSION_FILTER)
# The default value is: $file:$line: $text.

WARN_FORMAT            = "$file:$line: $text"

# The WARN_LOGFILE tag can be used to specify a file to which warning and error
# messages should be written. If left blank the output is written to standard
# error (stderr).

WARN_LOGFILE           =

#---------------------------------------------------------------------------
# Configuration options related to the input files
#---------------------------------------------------------------------------

# The INPUT tag is used to specify the files and/or directories that contain
# documented source files. You may enter file names like myfile.cpp or
# directories like /usr/src/myproject. Separate the files or directories with
# spaces. See also FILE_PATTERNS and EXTENSION_MAPPING
# Note: If this tag is empty the current directory is searched.

INPUT                  =

# This tag can be used to specify the character encoding of the source files
# that doxygen parses. Internally doxygen uses the UTF-8 encoding. Doxygen uses
# libiconv (or the iconv built into libc) for the transcoding. See the libiconv
# documentation (see: http://www.gnu.org/software/libiconv) for the list of
# possible encodings.
# The default value is: UTF-8.

INPUT_ENCODING         = UTF-8

# If the value of the INPUT tag contains directories, you can use the
# FILE_PATTERNS tag to specify one or more wildcard patterns (like *.cpp and
# *.h) to filter out the source-files in the directories.
#
# Note that for custom extensions or not directly supported extensions you also
# need to set EXTENSION_MAPPING for the extension otherwise the files are not
# read by doxygen.
#
# If left blank the following patterns are tested:*.c, *.cc, *.cxx, *.cpp,
# *.c++, *.java, *.ii, *.ixx, *.ipp, *.i++, *.inl, *.idl, *.ddl, *.odl, *.h,
# *.hh, *.hxx, *.hpp, *.h++, *.cs, *.d, *.php, *.php4, *.php5, *.phtml, *.inc,
# *.m, *.markdown, *.md, *.mm, *.dox, *.py, *.pyw, *.f90, *.f95, *.f03, *.f08,
# *.f, *.for, *.tcl, *.vhd, *.vhdl, *.ucf and *.qsf.

FILE_PATTERNS          = *.c \
                         *.cc \
                         *.cxx \
                         *.cpp \
                         *.c++ \
                         *.java \
                         *.ii \
                         *.ixx \
                         *.ipp \
                         *.i++ \
                         *.inl \
                         *.idl \
                         *.ddl \
                         *.odl \
                         *.h \
                         *.hh \
                         *.hxx \
                         *.hpp \
                         *.h++ \
                         *.cs \
                         *.d \
                         *.php \
                         *.php4 \
                         *.php5 \
                         *.phtml \
                         *.inc \
                         *.m \
                         *.markdown \
                         *.md \
                         *.mm \
                         *.dox \
                         *.py \
                         *.pyw \
                         *.f90 \
                         *.f95 \
                         *.f03 \
                         *.f08 \
                         *.f \
                         *.for \
                         *.tcl \
                         *.vhd \
                         *.vhdl \
                         *.ucf \
                         *.qsf

# The RECURSIVE tag can be used to specify whether or not subdirectories should
# be searched for input files as well.
# The default value is: NO.

RECURSIVE              = YES

# The EXCLUDE tag can be used to specify files and/or directories that should be
# excluded from the INPUT source files. This way you can easily exclude a
# subdirectory from a directory tree whose root is specified with the INPUT tag.
#
# Note that relative paths are relative to the directory from which doxygen is
# run.

EXCLUDE                =

# The EXCLUDE_SYMLINKS tag can be used to select whether or not files or
# directories that are symbolic links (a Unix file system feature) are excluded
# from the input.
# The default value is: NO.

EXCLUDE_SYMLINKS       = NO

# If the value of the INPUT tag contains directories, you can use the
# EXCLUDE_PATTERNS tag to specify one or more wildcard patterns to exclude
# certain files from those directories.
#
# Note that the wildcards are matched against the file with absolute path, so to
# exclude all test directories for example use the pattern */test/*

EXCLUDE_PATTERNS       =

# The EXCLUDE_SYMBOLS tag can be used to specify one or more symbol names
# (namespaces, classes, functions, etc.) that should be excluded from the
# output. The symbol name can be a fully qualified name, a word, or if the
# wildcard * is used, a substring. Examples: ANamespace, AClass,
# AClass::ANamespace, ANamespace::*Test
#
# Note that the wildcards are matched against the file with absolute path, so to
# exclude all test directories use the pattern */test/*

EXCLUDE_SYMBOLS        =

# The EXAMPLE_PATH tag can be used to specify one or more files or directories
# that contain example code fragments that are included (see the \include
# command).

EXAMPLE_PATH           =

# If the value of the EXAMPLE_PATH tag contains directories, you can use the
# EXAMPLE_PATTERNS tag to specify one or more wildcard pattern (like *.cpp and
# *.h) to filter out the source-files in the directories. If left blank all
# files are included.

EXAMPLE_PATTERNS       = *

# If the EXAMPLE_RECURSIVE tag is set to YES then subdirectories will be
# searched for input files to be used with the \include or \dontinclude commands
# irrespective of the value of the RECURSIVE tag.
# The default value is: NO.

EXAMPLE_RECURSIVE      = NO

# The IMAGE_PATH tag can be used to specify one or more files or directories
# that contain images that are to be included in the documentation (see the
# \image command).

IMAGE_PATH             =

# The INPUT_FILTER tag can be used to specify a program that doxygen should
# invoke to filter for each input file. Doxygen will invoke the filter program
# by executing (via popen()) the command:
#
# <filter> <input-file>
#
# where <filter> is the value of the INPUT_FILTER tag, and <input-file> is the
# name of an input file. Doxygen will then use the output that the filter
# program writes to standard output. If FILTER_PATTERNS is specified, this tag
# will be ignored.
#
# Note that the filter must not add or remove lines; it is applied before the
# code is scanned, but not when the output code is generated. If lines are added
# or removed, the anchors will not be placed correctly.
#
# Note that for custom extensions or not directly supported extensions you also
# need to set EXTENSION_MAPPING for the extension otherwise the files are not
# properly processed by doxygen.

INPUT_FILTER           =

# The FILTER_PATTERNS tag can be used to specify filters on a per file pattern
# basis. Doxygen will compare the file name with each pattern and apply the
# filter if there is a match. The filters are a list of the form: pattern=filter
# (like *.cpp=my_cpp_filter). See INPUT_FILTER for further information on how
# filters are used. If the FILTER_PATTERNS tag is empty or if none of the
# patterns match the file name, INPUT_FILTER is applied.
#
# Note that for custom extensions or not directly supported extensions you also
# need to set EXTENSION_MAPPING for the extension otherwise the files are not
# properly processed by doxygen.

FILTER_PATTERNS        =

# If the FILTER_SOURCE_FILES tag is set to YES, the input filter (if set using
# INPUT_FILTER) will also be used to filter the input files that are used for
# producing the source files to browse (i.e. when SOURCE_BROWSER is set to YES).
# The default value is: NO.

FILTER_SOURCE_FILES    = NO

# The FILTER_SOURCE_PATTERNS tag can be used to specify source filters per file
# pattern. A pattern will override the setting for FILTER_PATTERN (if any) and
# it is also possible to disable source filtering for a specific pattern using
# *.ext= (so without naming a filter).
# This tag requires that the tag FILTER_SOURCE_FILES is set to YES.

FILTER_SOURCE_PATTERNS =

# If the USE_MDFILE_AS_MAINPAGE tag refers to the name of a markdown file that
# is part of the input, its contents will be placed on the main page
# (index.html). This can be useful if you have a project on for instance GitHub
# and want to reuse the introduction page also for the doxygen output.

USE_MDFILE_AS_MAINPAGE =

#---------------------------------------------------------------------------
# Configuration options related to source browsing
#---------------------------------------------------------------------------

# If the SOURCE_BROWSER tag is set to YES then a list of source files will be
# generated. Documented entities will be cross-referenced with these sources.
#
# Note: To get rid of all source code in the generated output, make sure that
# also VERBATIM_HEADERS is set to NO.
# The default value is: NO.

SOURCE_BROWSER         = NO

# Setting the INLINE_SOURCES tag to YES will include the body of functions,
# classes and enums directly into the documentation.
# The default value is: NO.

INLINE_SOURCES         = NO

# Setting the STRIP_CODE_COMMENTS tag to YES will instruct doxygen to hide any
# special comment blocks from generated source code fragments. Normal C, C++ and
# Fortran comments will always remain visible.
# The default value is: YES.

STRIP_CODE_COMMENTS    = YES

# If the REFERENCED_BY_RELATION tag is set to YES then for each documented
# function all documented functions referencing it will be listed.
# The default value is: NO.

REFERENCED_BY_RELATION = NO

# If the REFERENCES_RELATION tag is set to YES then for each documented function
# all documented entities called/used by that function will be listed.
# The default value is: NO.

REFERENCES_RELATION    = NO

# If the REFERENCES_LINK_SOURCE tag is set to YES and SOURCE_BROWSER tag is set
# to YES then the hyperlinks from functions in REFERENCES_RELATION and
# REFERENCED_BY_RELATION lists will link to the source code. Otherwise they will
# link to the documentation.
# The default value is: YES.

REFERENCES_LINK_SOURCE = YES

# If SOURCE_TOOLTIPS is enabled (the default) then hovering a hyperlink in the
# source code will show a tooltip with additional information such as prototype,
# brief description and links to the definition and documentation. Since this
# will make the HTML file larger and loading of large files a bit slower, you
# can opt to disable this feature.
# The default value is: YES.
# This tag requires that the tag SOURCE_BROWSER is set to YES.

SOURCE_TOOLTIPS        = YES

# If the USE_HTAGS tag is set to YES then the references to source code will
# point to the HTML generated by the htags(1) tool instead of doxygen built-in
# source browser. The htags tool is part of GNU's global source tagging system
# (see http://www.gnu.org/software/global/global.html). You will need version
# 4.8.6 or higher.
#
# To use it do the following:
# - Install the latest version of global
# - Enable SOURCE_BROWSER and USE_HTAGS in the config file
# - Make sure the INPUT points to the root of the source tree
# - Run doxygen as normal
#
# Doxygen will invoke htags (and that will in turn invoke gtags), so these
# tools must be available from the command line (i.e. in the search path).
#
# The result: instead of the source browser generated by doxygen, the links to
# source code will now point to the output of htags.
# The default value is: NO.
# This tag requires that the tag SOURCE_BROWSER is set to YES.

USE_HTAGS              = NO

# If the VERBATIM_HEADERS tag is set the YES then doxygen will generate a
# verbatim copy of the header file for each class for which an include is
# specified. Set to NO to disable this.
# See also: Section \class.
# The default value is: YES.

VERBATIM_HEADERS       = YES

# If the CLANG_ASSISTED_PARSING tag is set to YES then doxygen will use the
# clang parser (see: http://clang.llvm.org/) for more accurate parsing at the
# cost of reduced performance. This can be particularly helpful with template
# rich C++ code for which doxygen's built-in parser lacks the necessary type
# information.
# Note: The availability of this option depends on whether or not doxygen was
# generated with the -Duse-libclang=ON option for CMake.
# The default value is: NO.

CLANG_ASSISTED_PARSING = NO

# If clang assisted parsing is enabled you can provide the compiler with command
# line options that you would normally use when invoking the compiler. Note that
# the include paths will already be set by doxygen for the files and directories
# specified with INPUT and INCLUDE_PATH.
# This tag requires that the tag CLANG_ASSISTED_PARSING is set to YES.

CLANG_OPTIONS          =

#---------------------------------------------------------------------------
# Configuration options related to the alphabetical class index
#---------------------------------------------------------------------------

# If the ALPHABETICAL_INDEX tag is set to YES, an alphabetical index of all
# compounds will be generated. Enable this if the project contains a lot of
# classes, structs, unions or interfaces.
# The default value is: YES.

ALPHABETICAL_INDEX     = YES

# The COLS_IN_ALPHA_INDEX tag can be used to specify the number of columns in
# which the alphabetical index list will be split.
# Minimum value: 1, maximum value: 20, default value: 5.
# This tag requires that the tag ALPHABETICAL_INDEX is set to YES.

COLS_IN_ALPHA_INDEX    = 5

# In case all classes in a project start with a common prefix, all classes will
# be put under the same header in the alphabetical index. The IGNORE_PREFIX tag
# can be used to specify a prefix (or a list of prefixes) that should be ignored
# while generating the index headers.
# This tag requires that the tag ALPHABETICAL_INDEX is set to YES.

IGNORE_PREFIX          =

#---------------------------------------------------------------------------
# Configuration options related to the HTML output
#---------------------------------------------------------------------------

# If the GENERATE_HTML tag is set to YES, doxygen will generate HTML output
# The default value is: YES.

GENERATE_HTML          = YES

# The HTML_OUTPUT tag is used to specify where the HTML docs will be put. If a
# relative path is entered the value of OUTPUT_DIRECTORY will be put in front of
# it.
# The default directory is: html.
# This tag requires that the tag GENERATE_HTML is set to YES.

HTML_OUTPUT            = html

# The HTML_FILE_EXTENSION tag can be used to specify the file extension for each
# generated HTML page (for example: .htm, .php, .asp).
# The default value is: .html.
# This tag requires that the tag GENERATE_HTML is set to YES.

HTML_FILE_EXTENSION    = .html

# The HTML_HEADER tag can be used to specify a user-defined HTML header file for
# each generated HTML page. If the tag is left blank doxygen will generate a
# standard header.
#
# To get valid HTML the header file that includes any scripts and style sheets
# that doxygen needs, which is dependent on the configuration options used (e.g.
# the setting GENERATE_TREEVIEW). It is highly recommended to start with a
# default header using
# doxygen -w html new_header.html new_footer.html new_stylesheet.css
# YourConfigFile
# and then modify the file new_header.html. See also section "Doxygen usage"
# for information on how to generate the default header that doxygen normally
# uses.
# Note: The header is subject to change so you typically have to regenerate the
# default header when upgrading to a newer version of doxygen. For a description
# of the possible markers and block names see the documentation.
# This tag requires that the tag GENERATE_HTML is set to YES.

HTML_HEADER            =

# The HTML_FOOTER tag can be used to specify a user-defined HTML footer for each
# generated HTML page. If the tag is left blank doxygen will generate a standard
# footer. See HTML_HEADER for more information on how to generate a default
# footer and what special commands can be used inside the footer. See also
# section "Doxygen usage" for information on how to generate the default footer
# that doxygen normally uses.
# This tag requires that the tag GENERATE_HTML is set to YES.

HTML_FOOTER            =

# The HTML_STYLESHEET tag can be used to specify a user-defined cascading style
# sheet that is used by each HTML page. It can be used to fine-tune the look of
# the HTML output. If left blank doxygen will generate a default style sheet.
# See also section "Doxygen usage" for information on how to generate the style
# sheet that doxygen normally uses.
# Note: It is recommended to use HTML_EXTRA_STYLESHEET instead of this tag, as
# it is more robust and this tag (HTML_STYLESHEET) will in the future become
# obsolete.
# This tag requires that the tag GENERATE_HTML is set to YES.

HTML_STYLESHEET        =

# The HTML_EXTRA_STYLESHEET tag can be used to specify additional user-defined
# cascading style sheets that are included after the standard style sheets
# created by doxygen. Using this option one can overrule certain style aspects.
# This is preferred over using HTML_STYLESHEET since it does not replace the
# standard style sheet and is therefore more robust against future updates.
# Doxygen will copy the style sheet files to the output directory.
# Note: The order of the extra style sheet files is of importance (e.g. the last
# style sheet in the list overrules the setting of the previous ones in the
# list). For an example see the documentation.
# This tag requires that the tag GENERATE_HTML is set to YES.

HTML_EXTRA_STYLESHEET  =

# The HTML_EXTRA_FILES tag can be used to specify one or more extra images or
# other source files which should be copied to the HTML output directory. Note
# that these files will be copied to the base HTML output directory. Use the
# $relpath^ marker in the HTML_HEADER and/or HTML_FOOTER files to load these
# files. In the HTML_STYLESHEET file, use the file name only. Also note that the
# files will be copied as-is; there are no commands or markers available.
# This tag requires that the tag GENERATE_HTML is set to YES.

HTML_EXTRA_FILES       =

# The HTML_COLORSTYLE_HUE tag controls the color of the HTML output. Doxygen
# will adjust the colors in the style sheet and background images according to
# this color. Hue is specified as an angle on a colorwheel, see
# http://en.wikipedia.org/wiki/Hue for more information. For instance the value
# 0 represents red, 60 is yellow, 120 is green, 180 is cyan, 240 is blue, 300
# purple, and 360 is red again.
# Minimum value: 0, maximum value: 359, default value: 220.
# This tag requires that the tag GENERATE_HTML is set to YES.

HTML_COLORSTYLE_HUE    = 220

# The HTML_COLORSTYLE_SAT tag controls the purity (or saturation) of the colors
# in the HTML output. For a value of 0 the output will use grayscales only. A
# value of 255 will produce the most vivid colors.
# Minimum value: 0, maximum value: 255, default value: 100.
# This tag requires that the tag GENERATE_HTML is set to YES.

HTML_COLORSTYLE_SAT    = 100

# The HTML_COLORSTYLE_GAMMA tag controls the gamma correction applied to the
# luminance component of the colors in the HTML output. Values below 100
# gradually make the output lighter, whereas values above 100 make the output
# darker. The value divided by 100 is the actual gamma applied, so 80 represents
# a gamma of 0.8, The value 220 represents a gamma of 2.2, and 100 does not
# change the gamma.
# Minimum value: 40, maximum value: 240, default value: 80.
# This tag requires that the tag GENERATE_HTML is set to YES.

HTML_COLORSTYLE_GAMMA  = 80

# If the HTML_TIMESTAMP tag is set to YES then the footer of each generated HTML
# page will contain the date and time when the page was generated. Setting this
# to YES can help to show when doxygen was last run and thus if the
# documentation is up to date.
# The default value is: NO.
# This tag requires that the tag GENERATE_HTML is set to YES.

HTML_TIMESTAMP         = NO

# If the HTML_DYNAMIC_SECTIONS tag is set to YES then the generated HTML
# documentation will contain sections that can be hidden and shown after the
# page has loaded.
# The default value is: NO.
# This tag requires that the tag GENERATE_HTML is set to YES.

HTML_DYNAMIC_SECTIONS  = NO

# With HTML_INDEX_NUM_ENTRIES one can control the preferred number of entries
# shown in the various tree structured indices initially; the user can expand
# and collapse entries dynamically later on. Doxygen will expand the tree to
# such a level that at most the specified number of entries are visible (unless
# a fully collapsed tree already exceeds this amount). So setting the number of
# entries 1 will produce a full collapsed tree by default. 0 is a special value
# representing an infinite number of entries and will result in a full expanded
# tree by default.
# Minimum value: 0, maximum value: 9999, default value: 100.
# This tag requires that the tag GENERATE_HTML is set to YES.

HTML_INDEX_NUM_ENTRIES = 100

# If the GENERATE_DOCSET tag is set to YES, additional index files will be
# generated that can be used as input for Apple's Xcode 3 integrated development
# environment (see: http://developer.apple.com/tools/xcode/), introduced with
# OSX 10.5 (Leopard). To create a documentation set, doxygen will generate a
# Makefile in the HTML output directory. Running make will produce the docset in
# that directory and running make install will install the docset in
# ~/Library/Developer/Shared/Documentation/DocSets so that Xcode will find it at
# startup. See http://developer.apple.com/tools/creatingdocsetswithdoxygen.html
# for more information.
# The default value is: NO.
# This tag requires that the tag GENERATE_HTML is set to YES.

GENERATE_DOCSET        = NO

# This tag determines the name of the docset feed. A documentation feed provides
# an umbrella under which multiple documentation sets from a single provider
# (such as a company or product suite) can be grouped.
# The default value is: Doxygen generated docs.
# This tag requires that the tag GENERATE_DOCSET is set to YES.

DOCSET_FEEDNAME        = "Doxygen generated docs"

# This tag specifies a string that should uniquely identify the documentation
# set bundle. This should be a reverse domain-name style string, e.g.
# com.mycompany.MyDocSet. Doxygen will append .docset to the name.
# The default value is: org.doxygen.Project.
# This tag requires that the tag GENERATE_DOCSET is set to YES.

DOCSET_BUNDLE_ID       = org.doxygen.Project

# The DOCSET_PUBLISHER_ID tag specifies a string that should uniquely identify
# the documentation publisher. This should be a reverse domain-name style
# string, e.g. com.mycompany.MyDocSet.documentation.
# The default value is: org.doxygen.Publisher.
# This tag requires that the tag GENERATE_DOCSET is set to YES.

DOCSET_PUBLISHER_ID    = org.doxygen.Publisher

# The DOCSET_PUBLISHER_NAME tag identifies the documentation publisher.
# The default value is: Publisher.
# This tag requires that the tag GENERATE_DOCSET is set to YES.

DOCSET_PUBLISHER_NAME  = Publisher

# If the GENERATE_HTMLHELP tag is set to YES then doxygen generates three
# additional HTML index files: index.hhp, index.hhc, and index.hhk. The
# index.hhp is a project file that can be read by Microsoft's HTML Help Workshop
# (see: http://www.microsoft.com/en-us/download/details.aspx?id=21138) on
# Windows.
#
# The HTML Help Workshop contains a compiler that can convert all HTML output
# generated by doxygen into a single compiled HTML file (.chm). Compiled HTML
# files are now used as the Windows 98 help format, and will replace the old
# Windows help format (.hlp) on all Windows platforms in the future. Compressed
# HTML files also contain an index, a table of contents, and you can search for
# words in the documentation. The HTML workshop also contains a viewer for
# compressed HTML files.
# The default value is: NO.
# This tag requires that the tag GENERATE_HTML is set to YES.

GENERATE_HTMLHELP      = NO

# The CHM_FILE tag can be used to specify the file name of the resulting .chm
# file. You can add a path in front of the file if the result should not be
# written to the html output directory.
# This tag requires that the tag GENERATE_HTMLHELP is set to YES.

CHM_FILE               =

# The HHC_LOCATION tag can be used to specify the location (absolute path
# including file name) of the HTML help compiler (hhc.exe). If non-empty,
# doxygen will try to run the HTML help compiler on the generated index.hhp.
# The file has to be specified with full path.
# This tag requires that the tag GENERATE_HTMLHELP is set to YES.

HHC_LOCATION           =

# The GENERATE_CHI flag controls if a separate .chi index file is generated
# (YES) or that it should be included in the master .chm file (NO).
# The default value is: NO.
# This tag requires that the tag GENERATE_HTMLHELP is set to YES.

GENERATE_CHI           = NO

# The CHM_INDEX_ENCODING is used to encode HtmlHelp index (hhk), content (hhc)
# and project file content.
# This tag requires that the tag GENERATE_HTMLHELP is set to YES.

CHM_INDEX_ENCODING     =

# The BINARY_TOC flag controls whether a binary table of contents is generated
# (YES) or a normal table of contents (NO) in the .chm file. Furthermore it
# enables the Previous and Next buttons.
# The default value is: NO.
# This tag requires that the tag GENERATE_HTMLHELP is set to YES.

BINARY_TOC             = NO

# The TOC_EXPAND flag can be set to YES to add extra items for group members to
# the table of contents of the HTML help documentation and to the tree view.
# The default value is: NO.
# This tag requires that the tag GENERATE_HTMLHELP is set to YES.

TOC_EXPAND             = NO

# If the GENERATE_QHP tag is set to YES and both QHP_NAMESPACE and
# QHP_VIRTUAL_FOLDER are set, an additional index file will be generated that
# can be used as input for Qt's qhelpgenerator to generate a Qt Compressed Help
# (.qch) of the generated HTML documentation.
# The default value is: NO.
# This tag requires that the tag GENERATE_HTML is set to YES.

GENERATE_QHP           = NO

# If the QHG_LOCATION tag is specified, the QCH_FILE tag can be used to specify
# the file name of the resulting .qch file. The path specified is relative to
# the HTML output folder.
# This tag requires that the tag GENERATE_QHP is set to YES.

QCH_FILE               =

# The QHP_NAMESPACE tag specifies the namespace to use when generating Qt Help
# Project output. For more information please see Qt Help Project / Namespace
# (see: http://qt-project.org/doc/qt-4.8/qthelpproject.html#namespace).
# The default value is: org.doxygen.Project.
# This tag requires that the tag GENERATE_QHP is set to YES.

QHP_NAMESPACE          = org.doxygen.Project

# The QHP_VIRTUAL_FOLDER tag specifies the namespace to use when generating Qt
# Help Project output. For more information please see Qt Help Project / Virtual
# Folders (see: http://qt-project.org/doc/qt-4.8/qthelpproject.html#virtual-
# folders).
# The default value is: doc.
# This tag requires that the tag GENERATE_QHP is set to YES.

QHP_VIRTUAL_FOLDER     = doc

# If the QHP_CUST_FILTER_NAME tag is set, it specifies the name of a custom
# filter to add. For more information please see Qt Help Project / Custom
# Filters (see: http://qt-project.org/doc/qt-4.8/qthelpproject.html#custom-
# filters).
# This tag requires that the tag GENERATE_QHP is set to YES.

QHP_CUST_FILTER_NAME   =

# The QHP_CUST_FILTER_ATTRS tag specifies the list of the attributes of the
# custom filter to add. For more information please see Qt Help Project / Custom
# Filters (see: http://qt-project.org/doc/qt-4.8/qthelpproject.html#custom-
# filters).
# This tag requires that the tag GENERATE_QHP is set to YES.

QHP_CUST_FILTER_ATTRS  =

# The QHP_SECT_FILTER_ATTRS tag specifies the list of the attributes this
# project's filter section matches. Qt Help Project / Filter Attributes (see:
# http://qt-project.org/doc/qt-4.8/qthelpproject.html#filter-attributes).
# This tag requires that the tag GENERATE_QHP is set to YES.

QHP_SECT_FILTER_ATTRS  =

# The QHG_LOCATION tag can be used to specify the location of Qt's
# qhelpgenerator. If non-empty doxygen will try to run qhelpgenerator on the
# generated .qhp file.
# This tag requires that the tag GENERATE_QHP is set to YES.

QHG_LOCATION           =

# If the GENERATE_ECLIPSEHELP tag is set to YES, additional index files will be
# generated, together with the HTML files, they form an Eclipse help plugin. To
# install this plugin and make it available under the help contents menu in
# Eclipse, the contents of the directory containing the HTML and XML files needs
# to be copied into the plugins directory of eclipse. The name of the directory
# within the plugins directory should be the same as the ECLIPSE_DOC_ID value.
# After copying Eclipse needs to be restarted before the help appears.
# The default value is: NO.
# This tag requires that the tag GENERATE_HTML is set to YES.

GENERATE_ECLIPSEHELP   = NO

# A unique identifier for the Eclipse help plugin. When installing the plugin
# the directory name containing the HTML and XML files should also have this
# name. Each documentation set should have its own identifier.
# The default value is: org.doxygen.Project.
# This tag requires that the tag GENERATE_ECLIPSEHELP is set to YES.

ECLIPSE_DOC_ID         = org.doxygen.Project

# If you want full control over the layout of the generated HTML pages it might
# be necessary to disable the index and replace it with your own. The
# DISABLE_INDEX tag can be used to turn on/off the condensed index (tabs) at top
# of each HTML page. A value of NO enables the index and the value YES disables
# it. Since the tabs in the index contain the same information as the navigation
# tree, you can set this option to YES if you also set GENERATE_TREEVIEW to YES.
# The default value is: NO.
# This tag requires that the tag GENERATE_HTML is set to YES.

DISABLE_INDEX          = NO

# The GENERATE_TREEVIEW tag is used to specify whether a tree-like index
# structure should be generated to display hierarchical information. If the tag
# value is set to YES, a side panel will be generated containing a tree-like
# index structure (just like the one that is generated for HTML Help). For this
# to work a browser that supports JavaScript, DHTML, CSS and frames is required
# (i.e. any modern browser). Windows users are probably better off using the
# HTML help feature. Via custom style sheets (see HTML_EXTRA_STYLESHEET) one can
# further fine-tune the look of the index. As an example, the default style
# sheet generated by doxygen has an example that shows how to put an image at
# the root of the tree instead of the PROJECT_NAME. Since the tree basically has
# the same information as the tab index, you could consider setting
# DISABLE_INDEX to YES when enabling this option.
# The default value is: NO.
# This tag requires that the tag GENERATE_HTML is set to YES.

GENERATE_TREEVIEW      = NO

# The ENUM_VALUES_PER_LINE tag can be used to set the number of enum values that
# doxygen will group on one line in the generated HTML documentation.
#
# Note that a value of 0 will completely suppress the enum values from appearing
# in the overview section.
# Minimum value: 0, maximum value: 20, default value: 4.
# This tag requires that the tag GENERATE_HTML is set to YES.

ENUM_VALUES_PER_LINE   = 4

# If the treeview is enabled (see GENERATE_TREEVIEW) then this tag can be used
# to set the initial width (in pixels) of the frame in which the tree is shown.
# Minimum value: 0, maximum value: 1500, default value: 250.
# This tag requires that the tag GENERATE_HTML is set to YES.

TREEVIEW_WIDTH         = 250

# If the EXT_LINKS_IN_WINDOW option is set to YES, doxygen will open links to
# external symbols imported via tag files in a separate window.
# The default value is: NO.
# This tag requires that the tag GENERATE_HTML is set to YES.

EXT_LINKS_IN_WINDOW    = NO

# Use this tag to change the font size of LaTeX formulas included as images in
# the HTML documentation. When you change the font size after a successful
# doxygen run you need to manually remove any form_*.png images from the HTML
# output directory to force them to be regenerated.
# Minimum value: 8, maximum value: 50, default value: 10.
# This tag requires that the tag GENERATE_HTML is set to YES.

FORMULA_FONTSIZE       = 10

# Use the FORMULA_TRANPARENT tag to determine whether or not the images
# generated for formulas are transparent PNGs. Transparent PNGs are not
# supported properly for IE 6.0, but are supported on all modern browsers.
#
# Note that when changing this option you need to delete any form_*.png files in
# the HTML output directory before the changes have effect.
# The default value is: YES.
# This tag requires that the tag GENERATE_HTML is set to YES.

FORMULA_TRANSPARENT    = YES

# Enable the USE_MATHJAX option to render LaTeX formulas using MathJax (see
# http://www.mathjax.org) which uses client side Javascript for the rendering
# instead of using pre-rendered bitmaps. Use this if you do not have LaTeX
# installed or if you want to formulas look prettier in the HTML output. When
# enabled you may also need to install MathJax separately and configure the path
# to it using the MATHJAX_RELPATH option.
# The default value is: NO.
# This tag requires that the tag GENERATE_HTML is set to YES.

USE_MATHJAX            = NO

# When MathJax is enabled you can set the default output format to be used for
# the MathJax output. See the MathJax site (see:
# http://docs.mathjax.org/en/latest/output.html) for more details.
# Possible values are: HTML-CSS (which is slower, but has the best
# compatibility), NativeMML (i.e. MathML) and SVG.
# The default value is: HTML-CSS.
# This tag requires that the tag USE_MATHJAX is set to YES.

MATHJAX_FORMAT         = HTML-CSS

# When MathJax is enabled you need to specify the location relative to the HTML
# output directory using the MATHJAX_RELPATH option. The destination directory
# should contain the MathJax.js script. For instance, if the mathjax directory
# is located at the same level as the HTML output directory, then
# MATHJAX_RELPATH should be ../mathjax. The default value points to the MathJax
# Content Delivery Network so you can quickly see the result without installing
# MathJax. However, it is strongly recommended to install a local copy of
# MathJax from http://www.mathjax.org before deployment.
# The default value is: http://cdn.mathjax.org/mathjax/latest.
# This tag requires that the tag USE_MATHJAX is set to YES.

MATHJAX_RELPATH        = http://cdn.mathjax.org/mathjax/latest

# The MATHJAX_EXTENSIONS tag can be used to specify one or more MathJax
# extension names that should be enabled during MathJax rendering. For example
# MATHJAX_EXTENSIONS = TeX/AMSmath TeX/AMSsymbols
# This tag requires that the tag USE_MATHJAX is set to YES.

MATHJAX_EXTENSIONS     =

# The MATHJAX_CODEFILE tag can be used to specify a file with javascript pieces
# of code that will be used on startup of the MathJax code. See the MathJax site
# (see: http://docs.mathjax.org/en/latest/output.html) for more details. For an
# example see the documentation.
# This tag requires that the tag USE_MATHJAX is set to YES.

MATHJAX_CODEFILE       =

# When the SEARCHENGINE tag is enabled doxygen will generate a search box for
# the HTML output. The underlying search engine uses javascript and DHTML and
# should work on any modern browser. Note that when using HTML help
# (GENERATE_HTMLHELP), Qt help (GENERATE_QHP), or docsets (GENERATE_DOCSET)
# there is already a search function so this one should typically be disabled.
# For large projects the javascript based search engine can be slow, then
# enabling SERVER_BASED_SEARCH may provide a better solution. It is possible to
# search using the keyboard; to jump to the search box use <access key> + S
# (what the <access key> is depends on the OS and browser, but it is typically
# <CTRL>, <ALT>/<option>, or both). Inside the search box use the <cursor down
# key> to jump into the search results window, the results can be navigated
# using the <cursor keys>. Press <Enter> to select an item or <escape> to cancel
# the search. The filter options can be selected when the cursor is inside the
# search box by pressing <Shift>+<cursor down>. Also here use the <cursor keys>
# to select a filter and <Enter> or <escape> to activate or cancel the filter
# option.
# The default value is: YES.
# This tag requires that the tag GENERATE_HTML is set to YES.

SEARCHENGINE           = YES

# When the SERVER_BASED_SEARCH tag is enabled the search engine will be
# implemented using a web server instead of a web client using Javascript. There
# are two flavors of web server based searching depending on the EXTERNAL_SEARCH
# setting. When disabled, doxygen will generate a PHP script for searching and
# an index file used by the script. When EXTERNAL_SEARCH is enabled the indexing
# and searching needs to be provided by external tools. See the section
# "External Indexing and Searching" for details.
# The default value is: NO.
# This tag requires that the tag SEARCHENGINE is set to YES.

SERVER_BASED_SEARCH    = NO

# When EXTERNAL_SEARCH tag is enabled doxygen will no longer generate the PHP
# script for searching. Instead the search results are written to an XML file
# which needs to be processed by an external indexer. Doxygen will invoke an
# external search engine pointed to by the SEARCHENGINE_URL option to obtain the
# search results.
#
# Doxygen ships with an example indexer (doxyindexer) and search engine
# (doxysearch.cgi) which are based on the open source search engine library
# Xapian (see: http://xapian.org/).
#
# See the section "External Indexing and Searching" for details.
# The default value is: NO.
# This tag requires that the tag SEARCHENGINE is set to YES.

EXTERNAL_SEARCH        = NO

# The SEARCHENGINE_URL should point to a search engine hosted by a web server
# which will return the search results when EXTERNAL_SEARCH is enabled.
#
# Doxygen ships with an example indexer (doxyindexer) and search engine
# (doxysearch.cgi) which are based on the open source search engine library
# Xapian (see: http://xapian.org/). See the section "External Indexing and
# Searching" for details.
# This tag requires that the tag SEARCHENGINE is set to YES.

SEARCHENGINE_URL       =

# When SERVER_BASED_SEARCH and EXTERNAL_SEARCH are both enabled the unindexed
# search data is written to a file for indexing by an external tool. With the
# SEARCHDATA_FILE tag the name of this file can be specified.
# The default file is: searchdata.xml.
# This tag requires that the tag SEARCHENGINE is set to YES.

SEARCHDATA_FILE        = searchdata.xml

# When SERVER_BASED_SEARCH and EXTERNAL_SEARCH are both enabled the
# EXTERNAL_SEARCH_ID tag can be used as an identifier for the project. This is
# useful in combination with EXTRA_SEARCH_MAPPINGS to search through multiple
# projects and redirect the results back to the right project.
# This tag requires that the tag SEARCHENGINE is set to YES.

EXTERNAL_SEARCH_ID     =

# The EXTRA_SEARCH_MAPPINGS tag can be used to enable searching through doxygen
# projects other than the one defined by this configuration file, but that are
# all added to the same external search index. Each project needs to have a
# unique id set via EXTERNAL_SEARCH_ID. The search mapping then maps the id of
# to a relative location where the documentation can be found. The format is:
# EXTRA_SEARCH_MAPPINGS = tagname1=loc1 tagname2=loc2 ...
# This tag requires that the tag SEARCHENGINE is set to YES.

EXTRA_SEARCH_MAPPINGS  =

#---------------------------------------------------------------------------
# Configuration options related to the LaTeX output
#---------------------------------------------------------------------------

# If the GENERATE_LATEX tag is set to YES, doxygen will generate LaTeX output.
# The default value is: YES.

GENERATE_LATEX         = YES

# The LATEX_OUTPUT tag is used to specify where the LaTeX docs will be put. If a
# relative path is entered the value of OUTPUT_DIRECTORY will be put in front of
# it.
# The default directory is: latex.
# This tag requires that the tag GENERATE_LATEX is set to YES.

LATEX_OUTPUT           = latex

# The LATEX_CMD_NAME tag can be used to specify the LaTeX command name to be
# invoked.
#
# Note that when enabling USE_PDFLATEX this option is only used for generating
# bitmaps for formulas in the HTML output, but not in the Makefile that is
# written to the output directory.
# The default file is: latex.
# This tag requires that the tag GENERATE_LATEX is set to YES.

LATEX_CMD_NAME         = latex

# The MAKEINDEX_CMD_NAME tag can be used to specify the command name to generate
# index for LaTeX.
# The default file is: makeindex.
# This tag requires that the tag GENERATE_LATEX is set to YES.

MAKEINDEX_CMD_NAME     = makeindex

# If the COMPACT_LATEX tag is set to YES, doxygen generates more compact LaTeX
# documents. This may be useful for small projects and may help to save some
# trees in general.
# The default value is: NO.
# This tag requires that the tag GENERATE_LATEX is set to YES.

COMPACT_LATEX          = NO

# The PAPER_TYPE tag can be used to set the paper type that is used by the
# printer.
# Possible values are: a4 (210 x 297 mm), letter (8.5 x 11 inches), legal (8.5 x
# 14 inches) and executive (7.25 x 10.5 inches).
# The default value is: a4.
# This tag requires that the tag GENERATE_LATEX is set to YES.

PAPER_TYPE             = a4

# The EXTRA_PACKAGES tag can be used to specify one or more LaTeX package names
# that should be included in the LaTeX output. The package can be specified just
# by its name or with the correct syntax as to be used with the LaTeX
# \usepackage command. To get the times font for instance you can specify :
# EXTRA_PACKAGES=times or EXTRA_PACKAGES={times}
# To use the option intlimits with the amsmath package you can specify:
# EXTRA_PACKAGES=[intlimits]{amsmath}
# If left blank no extra packages will be included.
# This tag requires that the tag GENERATE_LATEX is set to YES.

EXTRA_PACKAGES         =

# The LATEX_HEADER tag can be used to specify a personal LaTeX header for the
# generated LaTeX document. The header should contain everything until the first
# chapter. If it is left blank doxygen will generate a standard header. See
# section "Doxygen usage" for information on how to let doxygen write the
# default header to a separate file.
#
# Note: Only use a user-defined header if you know what you are doing! The
# following commands have a special meaning inside the header: $title,
# $datetime, $date, $doxygenversion, $projectname, $projectnumber,
# $projectbrief, $projectlogo. Doxygen will replace $title with the empty
# string, for the replacement values of the other commands the user is referred
# to HTML_HEADER.
# This tag requires that the tag GENERATE_LATEX is set to YES.

LATEX_HEADER           =

# The LATEX_FOOTER tag can be used to specify a personal LaTeX footer for the
# generated LaTeX document. The footer should contain everything after the last
# chapter. If it is left blank doxygen will generate a standard footer. See
# LATEX_HEADER for more information on how to generate a default footer and what
# special commands can be used inside the footer.
#
# Note: Only use a user-defined footer if you know what you are doing!
# This tag requires that the tag GENERATE_LATEX is set to YES.

LATEX_FOOTER           =

# The LATEX_EXTRA_STYLESHEET tag can be used to specify additional user-defined
# LaTeX style sheets that are included after the standard style sheets created
# by doxygen. Using this option one can overrule certain style aspects. Doxygen
# will copy the style sheet files to the output directory.
# Note: The order of the extra style sheet files is of importance (e.g. the last
# style sheet in the list overrules the setting of the previous ones in the
# list).
# This tag requires that the tag GENERATE_LATEX is set to YES.

LATEX_EXTRA_STYLESHEET =

# The LATEX_EXTRA_FILES tag can be used to specify one or more extra images or
# other source files which should be copied to the LATEX_OUTPUT output
# directory. Note that the files will be copied as-is; there are no commands or
# markers available.
# This tag requires that the tag GENERATE_LATEX is set to YES.

LATEX_EXTRA_FILES      =

# If the PDF_HYPERLINKS tag is set to YES, the LaTeX that is generated is
# prepared for conversion to PDF (using ps2pdf or pdflatex). The PDF file will
# contain links (just like the HTML output) instead of page references. This
# makes the output suitable for online browsing using a PDF viewer.
# The default value is: YES.
# This tag requires that the tag GENERATE_LATEX is set to YES.

PDF_HYPERLINKS         = YES

# If the USE_PDFLATEX tag is set to YES, doxygen will use pdflatex to generate
# the PDF file directly from the LaTeX files. Set this option to YES, to get a
# higher quality PDF documentation.
# The default value is: YES.
# This tag requires that the tag GENERATE_LATEX is set to YES.

USE_PDFLATEX           = YES

# If the LATEX_BATCHMODE tag is set to YES, doxygen will add the \batchmode
# command to the generated LaTeX files. This will instruct LaTeX to keep running
# if errors occur, instead of asking the user for help. This option is also used
# when generating formulas in HTML.
# The default value is: NO.
# This tag requires that the tag GENERATE_LATEX is set to YES.

LATEX_BATCHMODE        = NO

# If the LATEX_HIDE_INDICES tag is set to YES then doxygen will not include the
# index chapters (such as File Index, Compound Index, etc.) in the output.
# The default value is: NO.
# This tag requires that the tag GENERATE_LATEX is set to YES.

LATEX_HIDE_INDICES     = NO

# If the LATEX_SOURCE_CODE tag is set to YES then doxygen will include source
# code with syntax highlighting in the LaTeX output.
#
# Note that which sources are shown also depends on other settings such as
# SOURCE_BROWSER.
# The default value is: NO.
# This tag requires that the tag GENERATE_LATEX is set to YES.

LATEX_SOURCE_CODE      = NO

# The LATEX_BIB_STYLE tag can be used to specify the style to use for the
# bibliography, e.g. plainnat, or ieeetr. See
# http://en.wikipedia.org/wiki/BibTeX and \cite for more info.
# The default value is: plain.
# This tag requires that the tag GENERATE_LATEX is set to YES.

LATEX_BIB_STYLE        = plain

# If the LATEX_TIMESTAMP tag is set to YES then the footer of each generated
# page will contain the date and time when the page was generated. Setting this
# to NO can help when comparing the output of multiple runs.
# The default value is: NO.
# This tag requires that the tag GENERATE_LATEX is set to YES.

LATEX_TIMESTAMP        = NO

#---------------------------------------------------------------------------
# Configuration options related to the RTF output
#---------------------------------------------------------------------------

# If the GENERATE_RTF tag is set to YES, doxygen will generate RTF output. The
# RTF output is optimized for Word 97 and may not look too pretty with other RTF
# readers/editors.
# The default value is: NO.

GENERATE_RTF           = NO

# The RTF_OUTPUT tag is used to specify where the RTF docs will be put. If a
# relative path is entered the value of OUTPUT_DIRECTORY will be put in front of
# it.
# The default directory is: rtf.
# This tag requires that the tag GENERATE_RTF is set to YES.

RTF_OUTPUT             = rtf

# If the COMPACT_RTF tag is set to YES, doxygen generates more compact RTF
# documents. This may be useful for small projects and may help to save some
# trees in general.
# The default value is: NO.
# This tag requires that the tag GENERATE_RTF is set to YES.

COMPACT_RTF            = NO

# If the RTF_HYPERLINKS tag is set to YES, the RTF that is generated will
# contain hyperlink fields. The RTF file will contain links (just like the HTML
# output) instead of page references. This makes the output suitable for online
# browsing using Word or some other Word compatible readers that support those
# fields.
#
# Note: WordPad (write) and others do not support links.
# The default value is: NO.
# This tag requires that the tag GENERATE_RTF is set to YES.

RTF_HYPERLINKS         = NO

# Load stylesheet definitions from file. Syntax is similar to doxygen's config
# file, i.e. a series of assignments. You only have to provide replacements,
# missing definitions are set to their default value.
#
# See also section "Doxygen usage" for information on how to generate the
# default style sheet that doxygen normally uses.
# This tag requires that the tag GENERATE_RTF is set to YES.

RTF_STYLESHEET_FILE    =

# Set optional variables used in the generation of an RTF document. Syntax is
# similar to doxygen's config file. A template extensions file can be generated
# using doxygen -e rtf extensionFile.
# This tag requires that the tag GENERATE_RTF is set to YES.

RTF_EXTENSIONS_FILE    =

# If the RTF_SOURCE_CODE tag is set to YES then doxygen will include source code
# with syntax highlighting in the RTF output.
#
# Note that which sources are shown also depends on other settings such as
# SOURCE_BROWSER.
# The default value is: NO.
# This tag requires that the tag GENERATE_RTF is set to YES.

RTF_SOURCE_CODE        = NO

#---------------------------------------------------------------------------
# Configuration options related to the man page output
#---------------------------------------------------------------------------

# If the GENERATE_MAN tag is set to YES, doxygen will generate man pages for
# classes and files.
# The default value is: NO.

GENERATE_MAN           = NO

# The MAN_OUTPUT tag is used to specify where the man pages will be put. If a
# relative path is entered the value of OUTPUT_DIRECTORY will be put in front of
# it. A directory man3 will be created inside the directory specified by
# MAN_OUTPUT.
# The default directory is: man.
# This tag requires that the tag GENERATE_MAN is set to YES.

MAN_OUTPUT             = man

# The MAN_EXTENSION tag determines the extension that is added to the generated
# man pages. In case the manual section does not start with a number, the number
# 3 is prepended. The dot (.) at the beginning of the MAN_EXTENSION tag is
# optional.
# The default value is: .3.
# This tag requires that the tag GENERATE_MAN is set to YES.

MAN_EXTENSION          = .3

# The MAN_SUBDIR tag determines the name of the directory created within
# MAN_OUTPUT in which the man pages are placed. If defaults to man followed by
# MAN_EXTENSION with the initial . removed.
# This tag requires that the tag GENERATE_MAN is set to YES.

MAN_SUBDIR             =

# If the MAN_LINKS tag is set to YES and doxygen generates man output, then it
# will generate one additional man file for each entity documented in the real
# man page(s). These additional files only source the real man page, but without
# them the man command would be unable to find the correct page.
# The default value is: NO.
# This tag requires that the tag GENERATE_MAN is set to YES.

MAN_LINKS              = NO

#---------------------------------------------------------------------------
# Configuration options related to the XML output
#---------------------------------------------------------------------------

# If the GENERATE_XML tag is set to YES, doxygen will generate an XML file that
# captures the structure of the code including all documentation.
# The default value is: NO.

GENERATE_XML           = NO

# The XML_OUTPUT tag is used to specify where the XML pages will be put. If a
# relative path is entered the value of OUTPUT_DIRECTORY will be put in front of
# it.
# The default directory is: xml.
# This tag requires that the tag GENERATE_XML is set to YES.

XML_OUTPUT             = xml

# If the XML_PROGRAMLISTING tag is set to YES, doxygen will dump the program
# listings (including syntax highlighting and cross-referencing information) to
# the XML output. Note that enabling this will significantly increase the size
# of the XML output.
# The default value is: YES.
# This tag requires that the tag GENERATE_XML is set to YES.

XML_PROGRAMLISTING     = YES

#---------------------------------------------------------------------------
# Configuration options related to the DOCBOOK output
#---------------------------------------------------------------------------

# If the GENERATE_DOCBOOK tag is set to YES, doxygen will generate Docbook files
# that can be used to generate PDF.
# The default value is: NO.

GENERATE_DOCBOOK       = NO

# The DOCBOOK_OUTPUT tag is used to specify where the Docbook pages will be put.
# If a relative path is entered the value of OUTPUT_DIRECTORY will be put in
# front of it.
# The default directory is: docbook.
# This tag requires that the tag GENERATE_DOCBOOK is set to YES.

DOCBOOK_OUTPUT         = docbook

# If the DOCBOOK_PROGRAMLISTING tag is set to YES, doxygen will include the
# program listings (including syntax highlighting and cross-referencing
# information) to the DOCBOOK output. Note that enabling this will significantly
# increase the size of the DOCBOOK output.
# The default value is: NO.
# This tag requires that the tag GENERATE_DOCBOOK is set to YES.

DOCBOOK_PROGRAMLISTING = NO

#---------------------------------------------------------------------------
# Configuration options for the AutoGen Definitions output
#---------------------------------------------------------------------------

# If the GENERATE_AUTOGEN_DEF tag is set to YES, doxygen will generate an
# AutoGen Definitions (see http://autogen.sf.net) file that captures the
# structure of the code including all documentation. Note that this feature is
# still experimental and incomplete at the moment.
# The default value is: NO.

GENERATE_AUTOGEN_DEF   = NO

#---------------------------------------------------------------------------
# Configuration options related to the Perl module output
#---------------------------------------------------------------------------

# If the GENERATE_PERLMOD tag is set to YES, doxygen will generate a Perl module
# file that captures the structure of the code including all documentation.
#
# Note that this feature is still experimental and incomplete at the moment.
# The default value is: NO.

GENERATE_PERLMOD       = NO

# If the PERLMOD_LATEX tag is set to YES, doxygen will generate the necessary
# Makefile rules, Perl scripts and LaTeX code to be able to generate PDF and DVI
# output from the Perl module output.
# The default value is: NO.
# This tag requires that the tag GENERATE_PERLMOD is set to YES.

PERLMOD_LATEX          = NO

# If the PERLMOD_PRETTY tag is set to YES, the Perl module output will be nicely
# formatted so it can be parsed by a human reader. This is useful if you want to
# understand what is going on. On the other hand, if this tag is set to NO, the
# size of the Perl module output will be much smaller and Perl will parse it
# just the same.
# The default value is: YES.
# This tag requires that the tag GENERATE_PERLMOD is set to YES.

PERLMOD_PRETTY         = YES

# The names of the make variables in the generated doxyrules.make file are
# prefixed with the string contained in PERLMOD_MAKEVAR_PREFIX. This is useful
# so different doxyrules.make files included by the same Makefile don't
# overwrite each other's variables.
# This tag requires that the tag GENERATE_PERLMOD is set to YES.

PERLMOD_MAKEVAR_PREFIX =

#---------------------------------------------------------------------------
# Configuration options related to the preprocessor
#---------------------------------------------------------------------------

# If the ENABLE_PREPROCESSING tag is set to YES, doxygen will evaluate all
# C-preprocessor directives found in the sources and include files.
# The default value is: YES.

ENABLE_PREPROCESSING   = YES

# If the MACRO_EXPANSION tag is set to YES, doxygen will expand all macro names
# in the source code. If set to NO, only conditional compilation will be
# performed. Macro expansion can be done in a controlled way by setting
# EXPAND_ONLY_PREDEF to YES.
# The default value is: NO.
# This tag requires that the tag ENABLE_PREPROCESSING is set to YES.

MACRO_EXPANSION        = NO

# If the EXPAND_ONLY_PREDEF and MACRO_EXPANSION tags are both set to YES then
# the macro expansion is limited to the macros specified with the PREDEFINED and
# EXPAND_AS_DEFINED tags.
# The default value is: NO.
# This tag requires that the tag ENABLE_PREPROCESSING is set to YES.

EXPAND_ONLY_PREDEF     = NO

# If the SEARCH_INCLUDES tag is set to YES, the include files in the
# INCLUDE_PATH will be searched if a #include is found.
# The default value is: YES.
# This tag requires that the tag ENABLE_PREPROCESSING is set to YES.

SEARCH_INCLUDES        = YES

# The INCLUDE_PATH tag can be used to specify one or more directories that
# contain include files that are not input files but should be processed by the
# preprocessor.
# This tag requires that the tag SEARCH_INCLUDES is set to YES.

INCLUDE_PATH           =

# You can use the INCLUDE_FILE_PATTERNS tag to specify one or more wildcard
# patterns (like *.h and *.hpp) to filter out the header-files in the
# directories. If left blank, the patterns specified with FILE_PATTERNS will be
# used.
# This tag requires that the tag ENABLE_PREPROCESSING is set to YES.

INCLUDE_FILE_PATTERNS  =

# The PREDEFINED tag can be used to specify one or more macro names that are
# defined before the preprocessor is started (similar to the -D option of e.g.
# gcc). The argument of the tag is a list of macros of the form: name or
# name=definition (no spaces). If the definition and the "=" are omitted, "=1"
# is assumed. To prevent a macro definition from being undefined via #undef or
# recursively expanded use the := operator instead of the = operator.
# This tag requires that the tag ENABLE_PREPROCESSING is set to YES.

PREDEFINED             =

# If the MACRO_EXPANSION and EXPAND_ONLY_PREDEF tags are set to YES then this
# tag can be used to specify a list of macro names that should be expanded. The
# macro definition that is found in the sources will be used. Use the PREDEFINED
# tag if you want to use a different macro definition that overrules the
# definition found in the source code.
# This tag requires that the tag ENABLE_PREPROCESSING is set to YES.

EXPAND_AS_DEFINED      =

# If the SKIP_FUNCTION_MACROS tag is set to YES then doxygen's preprocessor will
# remove all references to function-like macros that are alone on a line, have
# an all uppercase name, and do not end with a semicolon. Such function macros
# are typically used for boiler-plate code, and will confuse the parser if not
# removed.
# The default value is: YES.
# This tag requires that the tag ENABLE_PREPROCESSING is set to YES.

SKIP_FUNCTION_MACROS   = YES

#---------------------------------------------------------------------------
# Configuration options related to external references
#---------------------------------------------------------------------------

# The TAGFILES tag can be used to specify one or more tag files. For each tag
# file the location of the external documentation should be added. The format of
# a tag file without this location is as follows:
# TAGFILES = file1 file2 ...
# Adding location for the tag files is done as follows:
# TAGFILES = file1=loc1 "file2 = loc2" ...
# where loc1 and loc2 can be relative or absolute paths or URLs. See the
# section "Linking to external documentation" for more information about the use
# of tag files.
# Note: Each tag file must have a unique name (where the name does NOT include
# the path). If a tag file is not located in the directory in which doxygen is
# run, you must also specify the path to the tagfile here.

TAGFILES               =

# When a file name is specified after GENERATE_TAGFILE, doxygen will create a
# tag file that is based on the input files it reads. See section "Linking to
# external documentation" for more information about the usage of tag files.

GENERATE_TAGFILE       =

# If the ALLEXTERNALS tag is set to YES, all external class will be listed in
# the class index. If set to NO, only the inherited external classes will be
# listed.
# The default value is: NO.

ALLEXTERNALS           = NO

# If the EXTERNAL_GROUPS tag is set to YES, all external groups will be listed
# in the modules index. If set to NO, only the current project's groups will be
# listed.
# The default value is: YES.

EXTERNAL_GROUPS        = YES

# If the EXTERNAL_PAGES tag is set to YES, all external pages will be listed in
# the related pages index. If set to NO, only the current project's pages will
# be listed.
# The default value is: YES.

EXTERNAL_PAGES         = YES

# The PERL_PATH should be the absolute path and name of the perl script
# interpreter (i.e. the result of 'which perl').
# The default file (with absolute path) is: /usr/bin/perl.

PERL_PATH              = /usr/bin/perl

#---------------------------------------------------------------------------
# Configuration options related to the dot tool
#---------------------------------------------------------------------------

# If the CLASS_DIAGRAMS tag is set to YES, doxygen will generate a class diagram
# (in HTML and LaTeX) for classes with base or super classes. Setting the tag to
# NO turns the diagrams off. Note that this option also works with HAVE_DOT
# disabled, but it is recommended to install and use dot, since it yields more
# powerful graphs.
# The default value is: YES.

CLASS_DIAGRAMS         = YES

# You can define message sequence charts within doxygen comments using the \msc
# command. Doxygen will then run the mscgen tool (see:
# http://www.mcternan.me.uk/mscgen/)) to produce the chart and insert it in the
# documentation. The MSCGEN_PATH tag allows you to specify the directory where
# the mscgen tool resides. If left empty the tool is assumed to be found in the
# default search path.

MSCGEN_PATH            =

# You can include diagrams made with dia in doxygen documentation. Doxygen will
# then run dia to produce the diagram and insert it in the documentation. The
# DIA_PATH tag allows you to specify the directory where the dia binary resides.
# If left empty dia is assumed to be found in the default search path.

DIA_PATH               =

# If set to YES the inheritance and collaboration graphs will hide inheritance
# and usage relations if the target is undocumented or is not a class.
# The default value is: YES.

HIDE_UNDOC_RELATIONS   = YES

# If you set the HAVE_DOT tag to YES then doxygen will assume the dot tool is
# available from the path. This tool is part of Graphviz (see:
# http://www.graphviz.org/), a graph visualization toolkit from AT&T and Lucent
# Bell Labs. The other options in this section have no effect if this option is
# set to NO
# The default value is: YES.

HAVE_DOT               = YES

# The DOT_NUM_THREADS specifies the number of dot invocations doxygen is allowed
# to run in parallel. When set to 0 doxygen will base this on the number of
# processors available in the system. You can set it explicitly to a value
# larger than 0 to get control over the balance between CPU load and processing
# speed.
# Minimum value: 0, maximum value: 32, default value: 0.
# This tag requires that the tag HAVE_DOT is set to YES.

DOT_NUM_THREADS        = 0

# When you want a differently looking font in the dot files that doxygen
# generates you can specify the font name using DOT_FONTNAME. You need to make
# sure dot is able to find the font, which can be done by putting it in a
# standard location or by setting the DOTFONTPATH environment variable or by
# setting DOT_FONTPATH to the directory containing the font.
# The default value is: Helvetica.
# This tag requires that the tag HAVE_DOT is set to YES.

DOT_FONTNAME           = Helvetica

# The DOT_FONTSIZE tag can be used to set the size (in points) of the font of
# dot graphs.
# Minimum value: 4, maximum value: 24, default value: 10.
# This tag requires that the tag HAVE_DOT is set to YES.

DOT_FONTSIZE           = 10

# By default doxygen will tell dot to use the default font as specified with
# DOT_FONTNAME. If you specify a different font using DOT_FONTNAME you can set
# the path where dot can find it using this tag.
# This tag requires that the tag HAVE_DOT is set to YES.

DOT_FONTPATH           =

# If the CLASS_GRAPH tag is set to YES then doxygen will generate a graph for
# each documented class showing the direct and indirect inheritance relations.
# Setting this tag to YES will force the CLASS_DIAGRAMS tag to NO.
# The default value is: YES.
# This tag requires that the tag HAVE_DOT is set to YES.

CLASS_GRAPH            = YES

# If the COLLABORATION_GRAPH tag is set to YES then doxygen will generate a
# graph for each documented class showing the direct and indirect implementation
# dependencies (inheritance, containment, and class references variables) of the
# class with other documented classes.
# The default value is: YES.
# This tag requires that the tag HAVE_DOT is set to YES.

COLLABORATION_GRAPH    = YES

# If the GROUP_GRAPHS tag is set to YES then doxygen will generate a graph for
# groups, showing the direct groups dependencies.
# The default value is: YES.
# This tag requires that the tag HAVE_DOT is set to YES.

GROUP_GRAPHS           = YES

# If the UML_LOOK tag is set to YES, doxygen will generate inheritance and
# collaboration diagrams in a style similar to the OMG's Unified Modeling
# Language.
# The default value is: NO.
# This tag requires that the tag HAVE_DOT is set to YES.

UML_LOOK               = NO

# If the UML_LOOK tag is enabled, the fields and methods are shown inside the
# class node. If there are many fields or methods and many nodes the graph may
# become too big to be useful. The UML_LIMIT_NUM_FIELDS threshold limits the
# number of items for each type to make the size more manageable. Set this to 0
# for no limit. Note that the threshold may be exceeded by 50% before the limit
# is enforced. So when you set the threshold to 10, up to 15 fields may appear,
# but if the number exceeds 15, the total amount of fields shown is limited to
# 10.
# Minimum value: 0, maximum value: 100, default value: 10.
# This tag requires that the tag HAVE_DOT is set to YES.

UML_LIMIT_NUM_FIELDS   = 10

# If the TEMPLATE_RELATIONS tag is set to YES then the inheritance and
# collaboration graphs will show the relations between templates and their
# instances.
# The default value is: NO.
# This tag requires that the tag HAVE_DOT is set to YES.

TEMPLATE_RELATIONS     = NO

# If the INCLUDE_GRAPH, ENABLE_PREPROCESSING and SEARCH_INCLUDES tags are set to
# YES then doxygen will generate a graph for each documented file showing the
# direct and indirect include dependencies of the file with other documented
# files.
# The default value is: YES.
# This tag requires that the tag HAVE_DOT is set to YES.

INCLUDE_GRAPH          = YES

# If the INCLUDED_BY_GRAPH, ENABLE_PREPROCESSING and SEARCH_INCLUDES tags are
# set to YES then doxygen will generate a graph for each documented file showing
# the direct and indirect include dependencies of the file with other documented
# files.
# The default value is: YES.
# This tag requires that the tag HAVE_DOT is set to YES.

INCLUDED_BY_GRAPH      = YES

# If the CALL_GRAPH tag is set to YES then doxygen will generate a call
# dependency graph for every global function or class method.
#
# Note that enabling this option will significantly increase the time of a run.
# So in most cases it will be better to enable call graphs for selected
# functions only using the \callgraph command. Disabling a call graph can be
# accomplished by means of the command \hidecallgraph.
# The default value is: NO.
# This tag requires that the tag HAVE_DOT is set to YES.

CALL_GRAPH             = NO

# If the CALLER_GRAPH tag is set to YES then doxygen will generate a caller
# dependency graph for every global function or class method.
#
# Note that enabling this option will significantly increase the time of a run.
# So in most cases it will be better to enable caller graphs for selected
# functions only using the \callergraph command. Disabling a caller graph can be
# accomplished by means of the command \hidecallergraph.
# The default value is: NO.
# This tag requires that the tag HAVE_DOT is set to YES.

CALLER_GRAPH           = NO

# If the GRAPHICAL_HIERARCHY tag is set to YES then doxygen will graphical
# hierarchy of all classes instead of a textual one.
# The default value is: YES.
# This tag requires that the tag HAVE_DOT is set to YES.

GRAPHICAL_HIERARCHY    = YES

# If the DIRECTORY_GRAPH tag is set to YES then doxygen will show the
# dependencies a directory has on other directories in a graphical way. The
# dependency relations are determined by the #include relations between the
# files in the directories.
# The default value is: YES.
# This tag requires that the tag HAVE_DOT is set to YES.

DIRECTORY_GRAPH        = YES

# The DOT_IMAGE_FORMAT tag can be used to set the image format of the images
# generated by dot. For an explanation of the image formats see the section
# output formats in the documentation of the dot tool (Graphviz (see:
# http://www.graphviz.org/)).
# Note: If you choose svg you need to set HTML_FILE_EXTENSION to xhtml in order
# to make the SVG files visible in IE 9+ (other browsers do not have this
# requirement).
# Possible values are: png, png:cairo, png:cairo:cairo, png:cairo:gd, png:gd,
# png:gd:gd, jpg, jpg:cairo, jpg:cairo:gd, jpg:gd, jpg:gd:gd, gif, gif:cairo,
# gif:cairo:gd, gif:gd, gif:gd:gd, svg, png:gd, png:gd:gd, png:cairo,
# png:cairo:gd, png:cairo:cairo, png:cairo:gdiplus, png:gdiplus and
# png:gdiplus:gdiplus.
# The default value is: png.
# This tag requires that the tag HAVE_DOT is set to YES.

DOT_IMAGE_FORMAT       = png

# If DOT_IMAGE_FORMAT is set to svg, then this option can be set to YES to
# enable generation of interactive SVG images that allow zooming and panning.
#
# Note that this requires a modern browser other than Internet Explorer. Tested
# and working are Firefox, Chrome, Safari, and Opera.
# Note: For IE 9+ you need to set HTML_FILE_EXTENSION to xhtml in order to make
# the SVG files visible. Older versions of IE do not have SVG support.
# The default value is: NO.
# This tag requires that the tag HAVE_DOT is set to YES.

INTERACTIVE_SVG        = NO

# The DOT_PATH tag can be used to specify the path where the dot tool can be
# found. If left blank, it is assumed the dot tool can be found in the path.
# This tag requires that the tag HAVE_DOT is set to YES.

DOT_PATH               =

# The DOTFILE_DIRS tag can be used to specify one or more directories that
# contain dot files that are included in the documentation (see the \dotfile
# command).
# This tag requires that the tag HAVE_DOT is set to YES.

DOTFILE_DIRS           =

# The MSCFILE_DIRS tag can be used to specify one or more directories that
# contain msc files that are included in the documentation (see the \mscfile
# command).

MSCFILE_DIRS           =

# The DIAFILE_DIRS tag can be used to specify one or more directories that
# contain dia files that are included in the documentation (see the \diafile
# command).

DIAFILE_DIRS           =

# When using plantuml, the PLANTUML_JAR_PATH tag should be used to specify the
# path where java can find the plantuml.jar file. If left blank, it is assumed
# PlantUML is not used or called during a preprocessing step. Doxygen will
# generate a warning when it encounters a \startuml command in this case and
# will not generate output for the diagram.

PLANTUML_JAR_PATH      =

# When using plantuml, the PLANTUML_CFG_FILE tag can be used to specify a
# configuration file for plantuml.

PLANTUML_CFG_FILE      =

# When using plantuml, the specified paths are searched for files specified by
# the !include statement in a plantuml block.

PLANTUML_INCLUDE_PATH  =

# The DOT_GRAPH_MAX_NODES tag can be used to set the maximum number of nodes
# that will be shown in the graph. If the number of nodes in a graph becomes
# larger than this value, doxygen will truncate the graph, which is visualized
# by representing a node as a red box. Note that doxygen if the number of direct
# children of the root node in a graph is already larger than
# DOT_GRAPH_MAX_NODES then the graph will not be shown at all. Also note that
# the size of a graph can be further restricted by MAX_DOT_GRAPH_DEPTH.
# Minimum value: 0, maximum value: 10000, default value: 50.
# This tag requires that the tag HAVE_DOT is set to YES.

DOT_GRAPH_MAX_NODES    = 50

# The MAX_DOT_GRAPH_DEPTH tag can be used to set the maximum depth of the graphs
# generated by dot. A depth value of 3 means that only nodes reachable from the
# root by following a path via at most 3 edges will be shown. Nodes that lay
# further from the root node will be omitted. Note that setting this option to 1
# or 2 may greatly reduce the computation time needed for large code bases. Also
# note that the size of a graph can be further restricted by
# DOT_GRAPH_MAX_NODES. Using a depth of 0 means no depth restriction.
# Minimum value: 0, maximum value: 1000, default value: 0.
# This tag requires that the tag HAVE_DOT is set to YES.

MAX_DOT_GRAPH_DEPTH    = 0

# Set the DOT_TRANSPARENT tag to YES to generate images with a transparent
# background. This is disabled by default, because dot on Windows does not seem
# to support this out of the box.
#
# Warning: Depending on the platform used, enabling this option may lead to
# badly anti-aliased labels on the edges of a graph (i.e. they become hard to
# read).
# The default value is: NO.
# This tag requires that the tag HAVE_DOT is set to YES.

DOT_TRANSPARENT        = NO

# Set the DOT_MULTI_TARGETS tag to YES to allow dot to generate multiple output
# files in one run (i.e. multiple -o and -T options on the command line). This
# makes dot run faster, but since only newer versions of dot (>1.8.10) support
# this, this feature is disabled by default.
# The default value is: NO.
# This tag requires that the tag HAVE_DOT is set to YES.

DOT_MULTI_TARGETS      = NO

# If the GENERATE_LEGEND tag is set to YES doxygen will generate a legend page
# explaining the meaning of the various boxes and arrows in the dot generated
# graphs.
# The default value is: YES.
# This tag requires that the tag HAVE_DOT is set to YES.

GENERATE_LEGEND        = YES

# If the DOT_CLEANUP tag is set to YES, doxygen will remove the intermediate dot
# files that are used to generate the various graphs.
# The default value is: YES.
# This tag requires that the tag HAVE_DOT is set to YES.

DOT_CLEANUP            = YES
Os fragmentos mais relevantes irei mencionar abaixo:
DOXYFILE_ENCODING = UTF-8
Aqui definiremos o tipo de codificação do seu manual, no meu caso UTF-8
PROJECT_NAME = “seu projeto”
No Project_name, estabelecemos o nome que será mostrado.
OUTPUT_DIRECTORY = ./docs/
Aqui definimos que iremos incluir as documentações geradas em sub pasta chamada docs.
OUTPUT_LANGUAGE = Brazilian
Aqui estabelecemos o idioma, que será usado.
FILE_PATTERNS = *.c \
O FILE_PATTERNS, define as extensões que serão analisadas como possíveis de serem documentadas.
Passo 3 – Incluindo rotina em seu construtor
Nesta etapa devemos criar processo de construção da documentação.
Esta etapa deve ser gerada, sempre que houver necessidade, e o ideal é que seja montado no construtor de seu binário.
Estabeleceremos aqui o padrão C de programação, incluindo em um makefile padrão.
Quem tem um PC, sabe que praticamente qualquer dispositivo atualmente esta conectado na USB.
Os dispositivos USB são cada vez mais populares, por sua praticidade e simplicidade.
O desenvolvimento e integração no linux, sempre foi um caminho tortuoso, neste post estarei desvendando um pouco de como funciona o desenvolvimento e o caminho a ser traçado.
O projeto libusb, é uma lib desenvolvida em C, para Linux, ela permite utilizar o protocolo USB da versão 1.0 até a 3.1.
CEF é o anacrônico de Chromium Embedded Framework, é uma interface para o Chromium em outras aplicações.
Estaremos tratando aqui, como realizar a instalação deste frame work.
Existem dois caminhos para realizar tal feito, o primeiro e mais complicado é através do procedimento de compilação total, o segundo é através da baixa dos binários já montados.
Compilação total
O Passo a passo que se segue foi tirado em pesquisa da web e consta entre outros links:
Rode o script, em ./code/chromium_git/chromium/src/cef/
cd ./code/chromium_git/chromium/src/cef/
./cef_create_projects.sh
Passo 9
Gera o binario com Debug usando Ninja
cd ~/code/chromium_git/chromium/src
ninja -C out/Debug_GN_x64 cefclient cefsimple ceftests chrome_sandbox
Caso queira versão final, substitua a palavra Debug por Release.
Passo 10
Configure o Linux SUID Caixa de areia, se voce esta usando um kernel antigo, versão inferior a 3.8.
# This environment variable should be set at all times.
export CHROME_DEVEL_SANDBOX=/usr/local/sbin/chrome-devel-sandbox

# This command only needs to be run a single time.
cd ~/code/chromium_git/chromium/src
sudo BUILDTYPE=Debug_GN_x64 ./build/update-linux-sandbox.sh
Passo 11
Rode o cefclient, cefsimple e ou ceftests. Note que o cefclient somente compilará se voce estiver usando um parametro nao root, no passo 7.
cd ~/code/chromium_git/chromium/src
./out/Debug_GN_x64/cefclient
Instalação através de Baixa de Binários
Neste processo não há de fato a compilação, apenas a etapa de linkagem dos binários.
Este é o processo que recomendo, pois além de ser mais rápido é mais fácil e dá menos problema na hora da instalação.
Passo 1 – Baixa dos Binários
O primeiro passo é baixar os binários através do site abaixo:
Nele existem diversas distribuições que podem ser vistas, é importante observar qual será o alvo da sua instalação. Para não baixar a distribuição errada, e eventualmente ter problemas com isso.
Lembrando que não é possível compilar um linux 32 com uma distribuição 64, pois a lib terá problemas na linkagem do mesmo. Então sempre escolha a versão que coincide com seu sistema operacional.
Caso não saiba qual é sua distribuição, recomendo, que use o comando,
uname -a
Conforme figura abaixo, podemos ver que meu linux é 64 bits, desta forma recomenda-se o uso da lib 64 bits.
Mostrando que é 64 bits
Desta forma seguiremos, com o padrão, conforme passado:
Agora baixe o binário, e instale na sua maquina linux descompactado.
Renomeie o arquivo para apenas cef, conforme figura abaixo.
Pasta montada no linux
Apenas para elucidar, estou usando o samba, que permite eu acessar as pastas do linux na minha maquina windows. Isso facilita a edição dos fontes.
Passo 2 – Preparação e Dependências.
Entre no linux pela console, entrando na pasta do cef. Digite o seguinte comando:
cmake .
Preparação para o make, onde irá peparar o makefile
Se não houver problemas de dependências, ele irá estar pronto para linkagem.
Caso dê problema, consulte a documentação, no link abaixo: